An important thing to notice though is that this doesn't require Power Automate or Power Apps, which can be complex to configure and depend on specific licensing. Everything here runs off a single DAX text measure.
What we're building
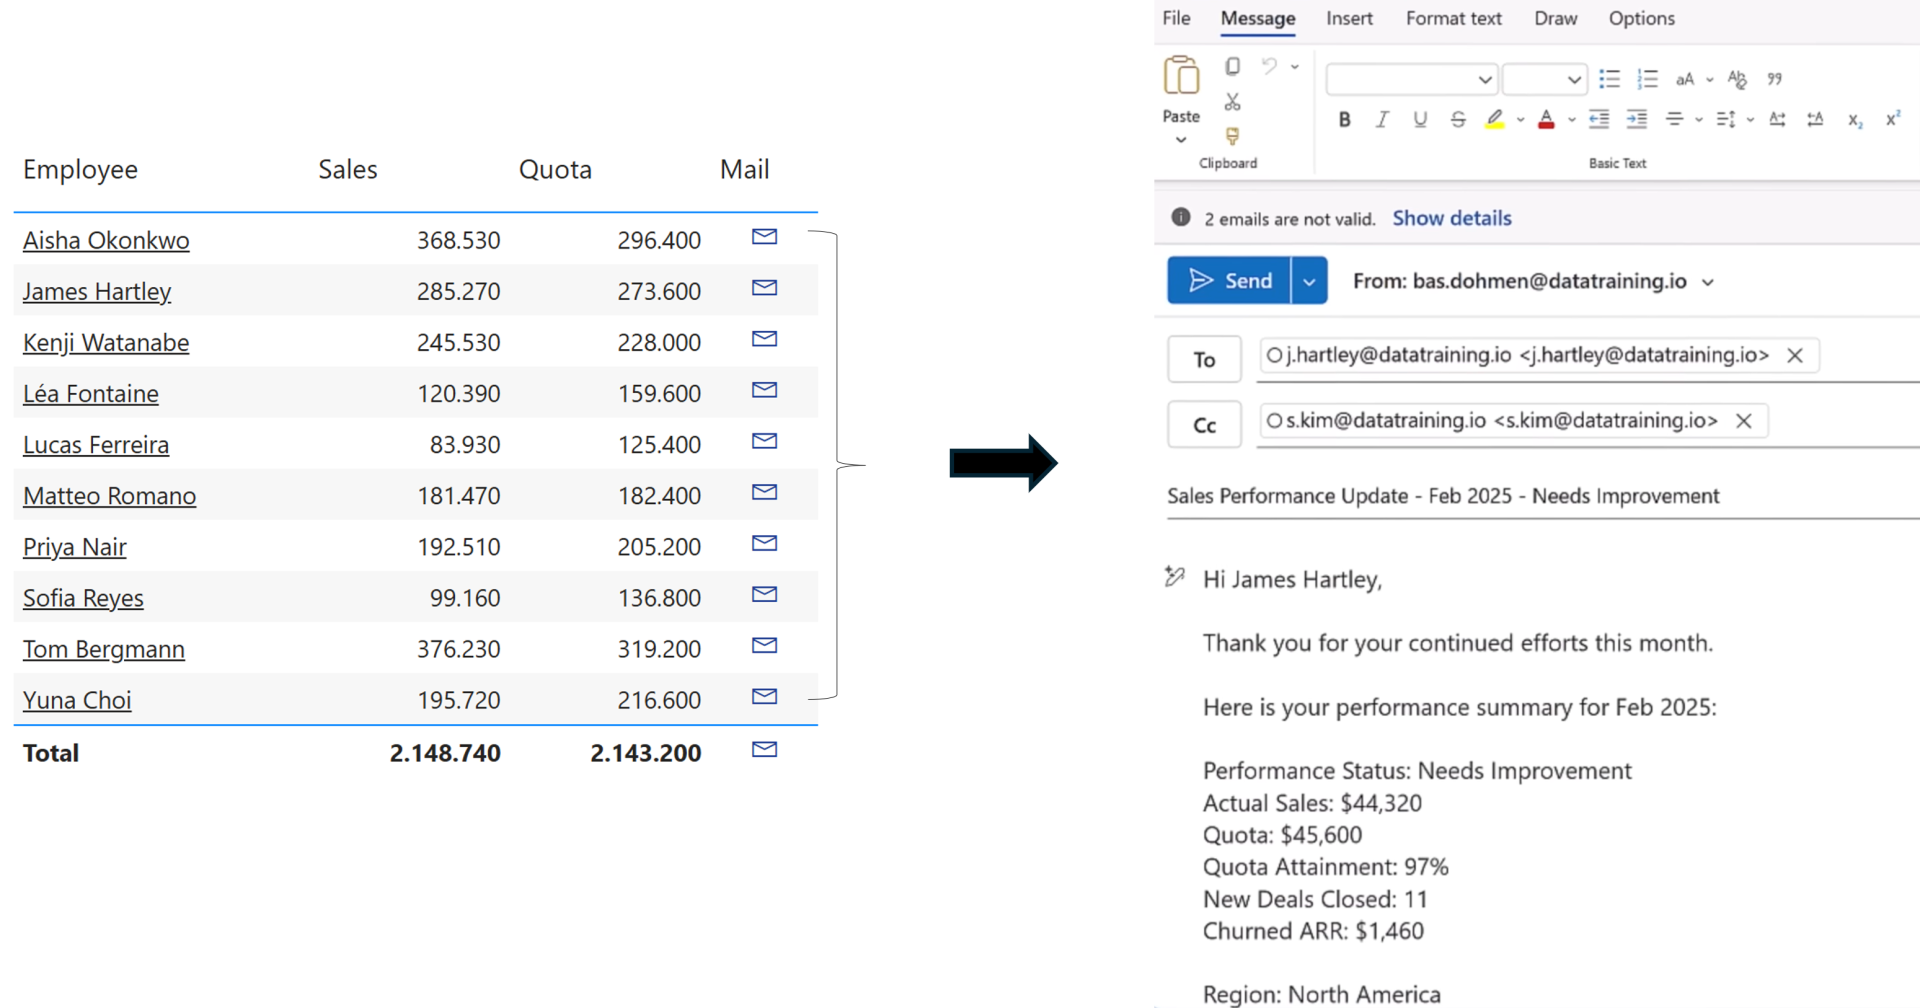
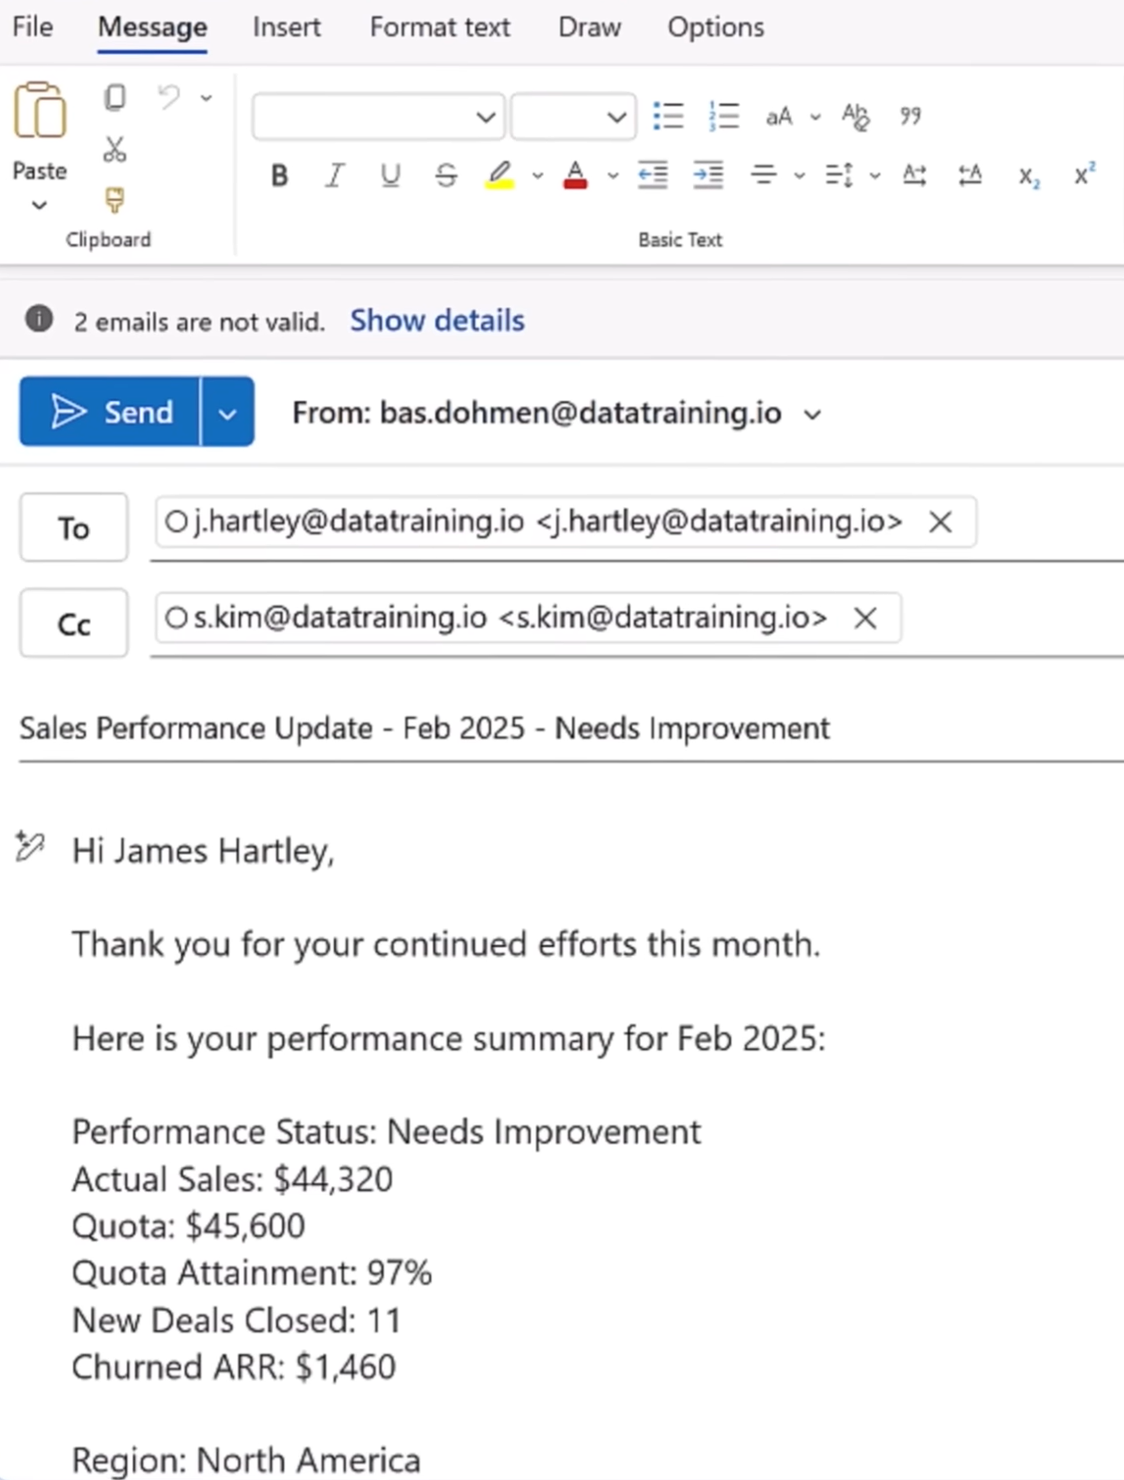
We already have a table visual in place with three columns - Employee Name, Sales, and Quota excluding the email functionality. We'll be building on top of that. Once set up, clicking a row in that table will open a pre-filled email with the employee's address in the To field, their manager automatically added in CC, a dynamic subject line, and a personalized body containing live sales data pulled directly from the report.
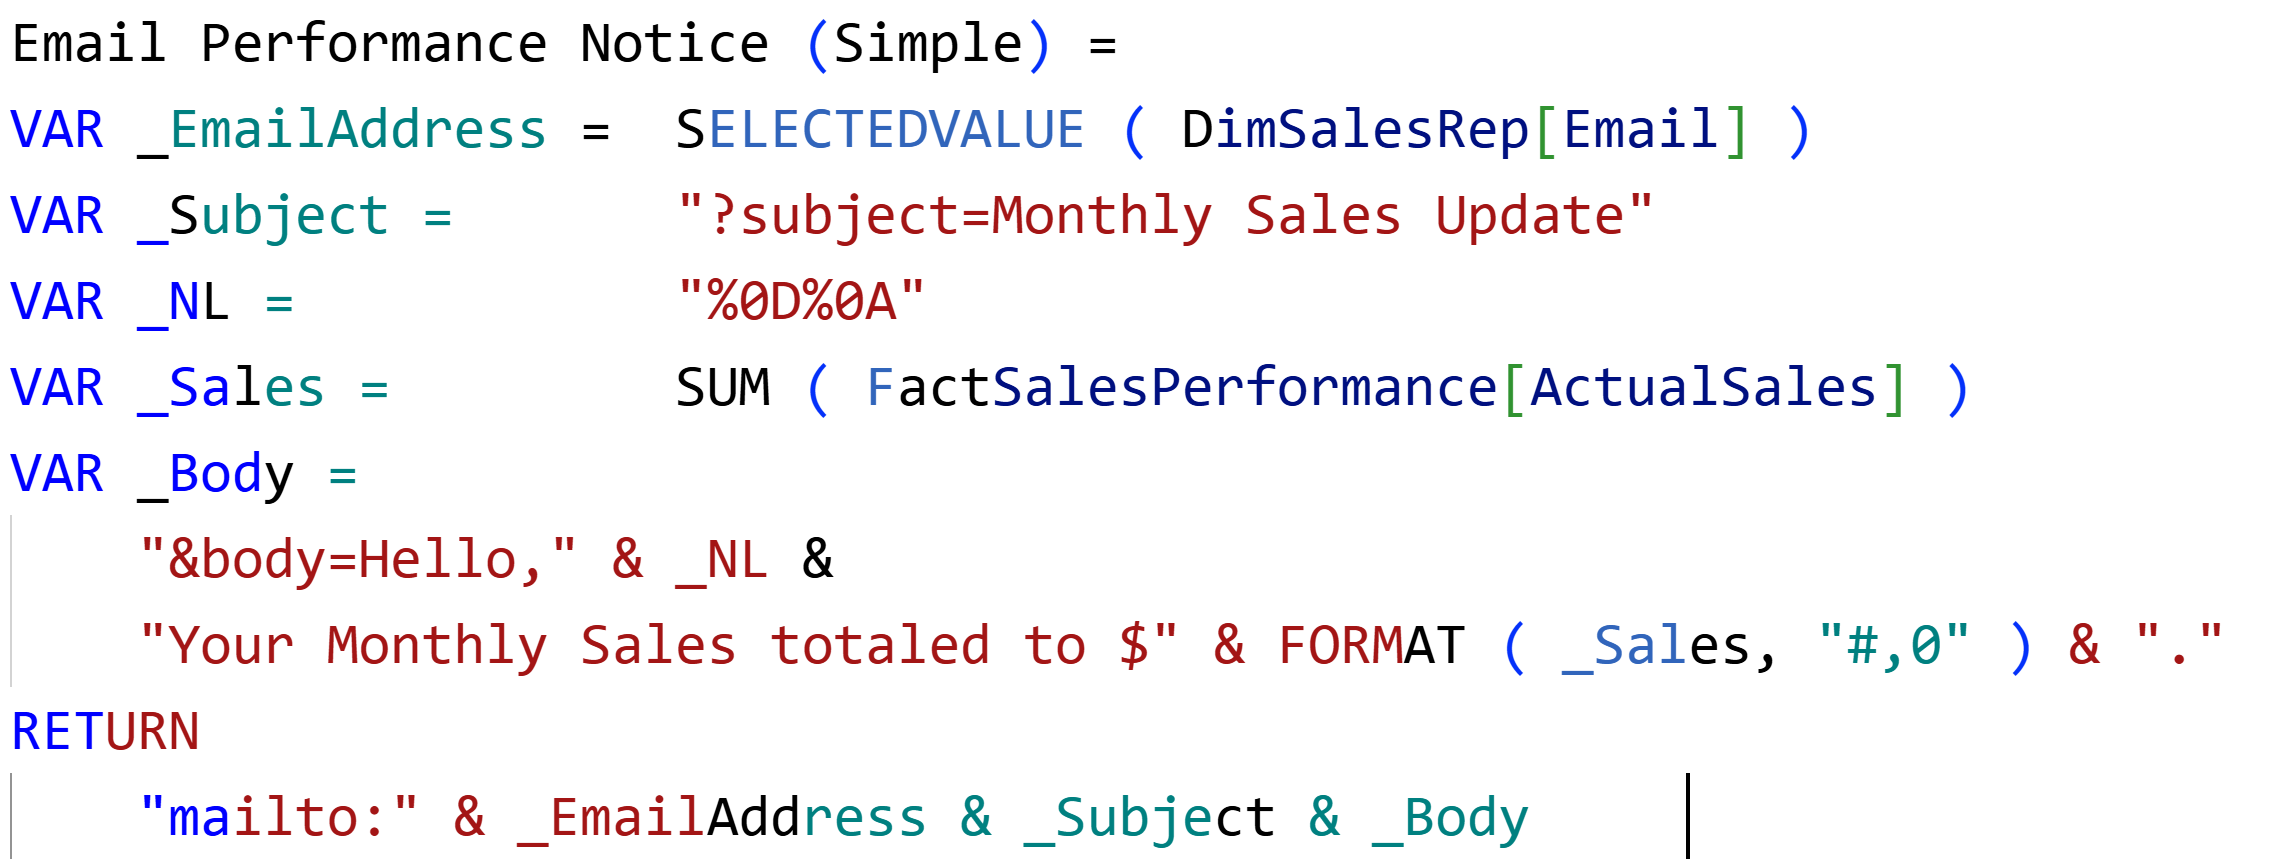
1. Create the base mail measure
Start by creating a new DAX measure. The entire mechanism is built around the mailto: URI scheme. When Power BI renders this as a clickable URL, it hands the address off to the user's default email client.
Use SELECTEDVALUE() to pull the email address from whichever row the user clicks. It only resolves when exactly one value is in context - which is precisely what happens when a row is selected in a table.

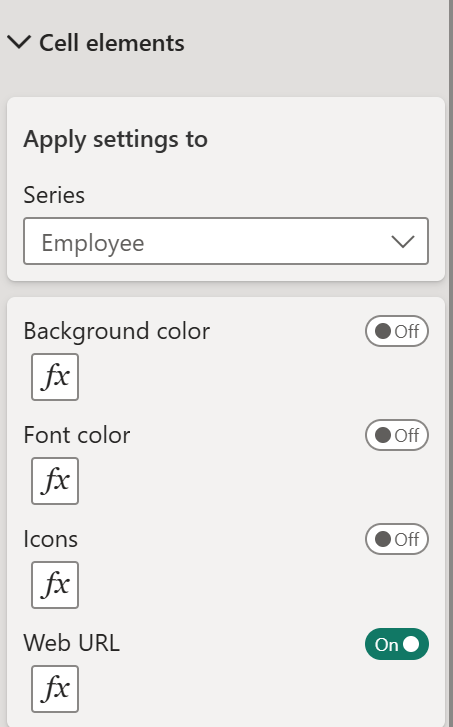
2. Make a column clickable with web URL
With the measure in place, link it to a column in your table visual so that clicking a cell triggers the email.
Select the table visual,
- open the Format pane, and navigate to Cell elements.
- Choose the column you want to be clickable - for example, Employee Name - then enable Web URL
- Select your mail measure as the field value.
Clicking any name in the table will now open the user's email client.
3. Add a subject line and body
Extend the measure with standard URL parameters. The mailto: scheme supports subject, body, cc, and bcc - use only the ones you need.
The first parameter is introduced with a ?, and each subsequent one with an &.
Watch out: Use “=” after parameter names, not “:”. Also, there must be no space between & and body, or else a space breaks the URL entirely.
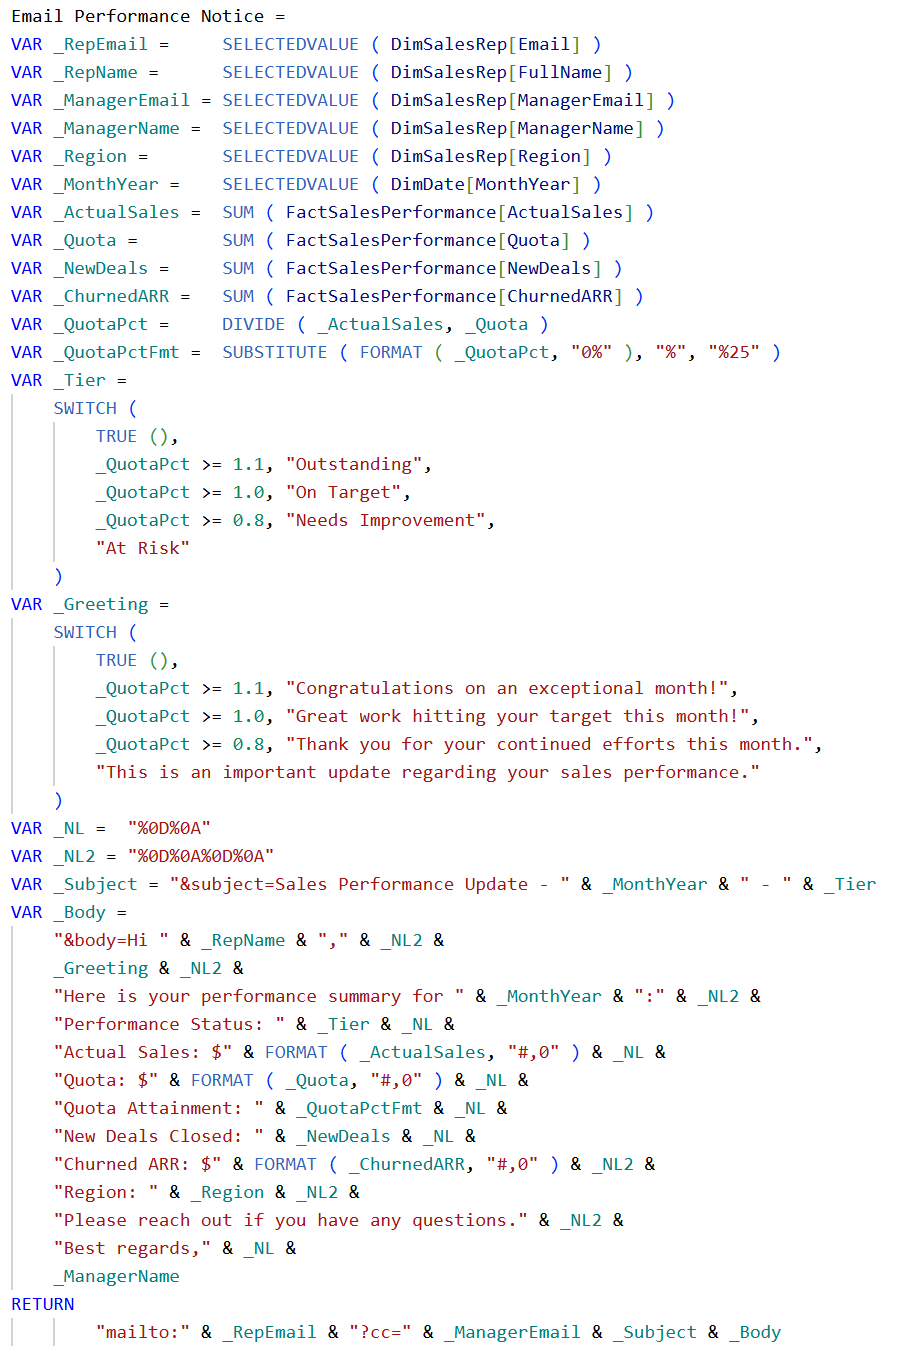
4. Inject live data values into the body
You can concatenate any measure into the email body using the & operator. Wrap numeric measures in FORMAT() to control how numbers appear - thousand separators, decimal places, currency symbols, and so on.
To start a new line inside the email body, insert the Windows carriage return and line feed sequence between your sentences. Outlook and most modern email clients interpret this correctly.
New lines in the body: Use "%0D%0A" between sentences to create a line break. Storing it in a variable keeps your measure readable when you need it multiple times.
Note: Escape special characters
Certain characters have reserved meaning inside a URL and will break your email body if left unescaped. The most common offender is the
percentage sign. If you display a formatted percentage, such as quota attainment - the % will be misread as the start of a URL escape sequence, and the body simply won't render.
The fix is to use SUBSTITUTE() to replace any literal % with its URL-encoded equivalent %25. Spaces, commas, and semicolons are generally handled correctly without escaping.
Debugging tip: If your email body appears blank or cuts off unexpectedly, a special character is almost always the cause. Check for %, &, #, and + in your body string.

Extension: Add conditional logic and a CC address
Because this is just a DAX measure, you have the complete flexibility. Use IF or SWITCH to personalize the message based on performance thresholds, pull a manager's email into CC using another SELECTEDVALUE, and make the subject line dynamic by including a selected month or period or as required.
Now you can click on the link (as we added in step 2), and see that we now have the email as we wanted it to be.
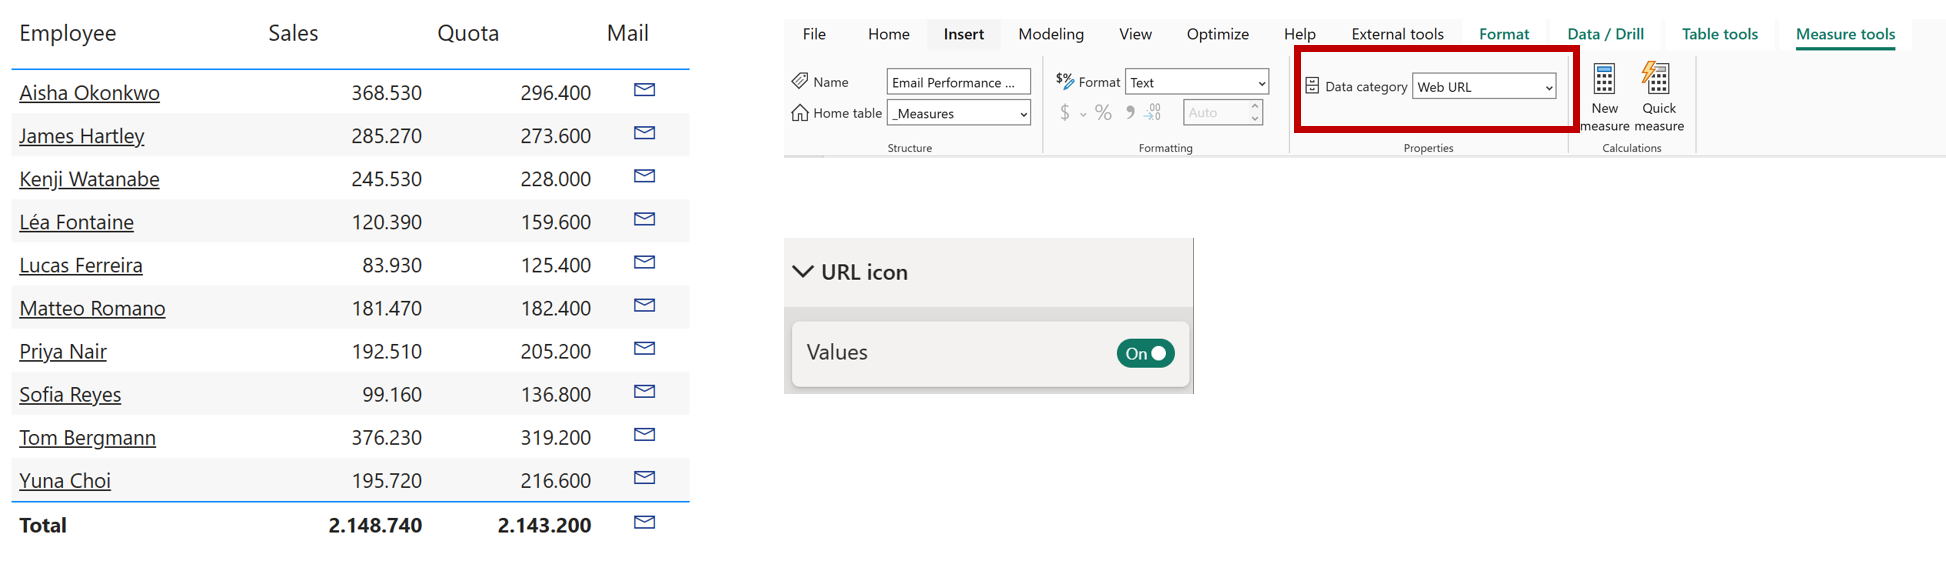
Bonus: Replace the text link with an email iconFinally to make it look neat, rather than attaching the URL to a name column, you can display a clean envelope icon in its own dedicated column. This makes the intent much more intuitive for end users.
To do this,
- Add the measure as a column in the table visual.
- Go to the model view, select the measure and set its Data category to Web URL under Measure tools.
- Go to the column's formatting options - URL icon and enable Values.
- Rename the column to something minimal - "Mail".
Each row now shows a small envelope icon. One click opens the pre-filled email with the recipient, CC, subject line, and body all populated - no extra effort from the user.
And that's all it takes - a single DAX measure to send contextual, data-driven emails directly from your Power BI report.
Hope you like it!
Give it a try and see how it works for you! I’d love to hear what you think or see how you use this trick in your own reports.

