Goal:
Create a personalized UX in Power BI where:
- Each user sees only the KPIs relevant to them.
- KPIs are automatically filtered based on their identity.
- It works fully automatically in the Power BI Service.
Step 1: Create a Field Parameter for KPI Selection
1. Go to Modeling → New Parameter → Fields.
2. Name the parameter e.g. KPIs.
3. Select the KPI measures you want to include (e.g., Total Sales, Online Sales, Store Sales).
4. Click Create.
Place the KPI parameter on the line chart and the new card visual:
Step 2: Assign KPIs to Groups
In the formula bar of the parameter table, add a KPI group ID column manually. Each row (KPI) gets assigned to a group.
Place the KPI group column onto slicer visual:
Adjusting the KPIs parameter to more realistic example, which creates 4 KPIs group:
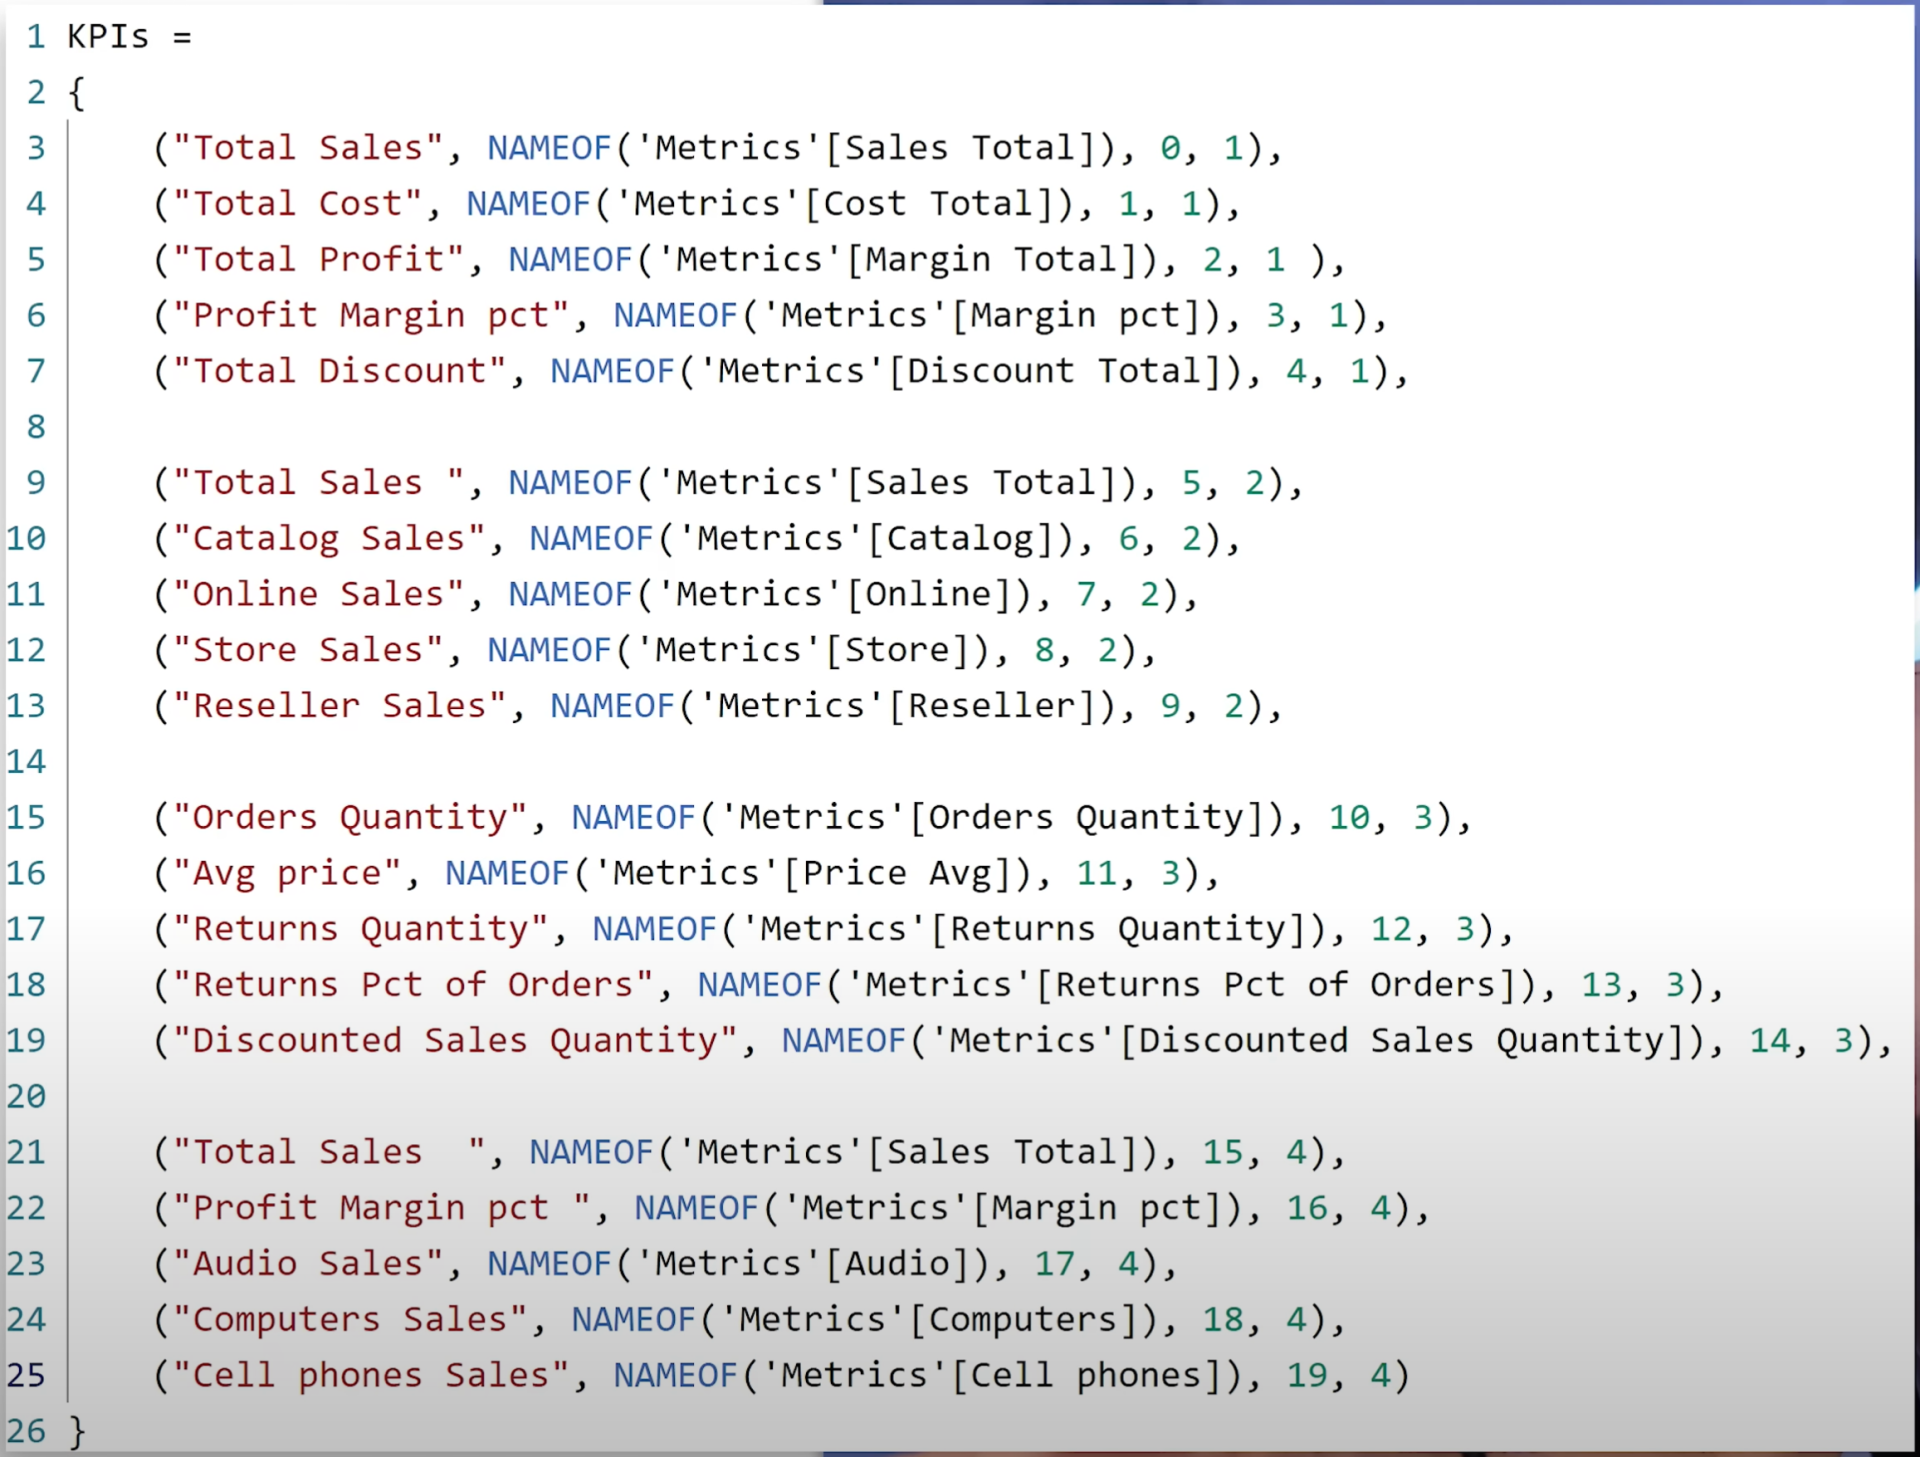
Step 3: Create Employee Table with Group Assignment
Make a table with:
- Email
- Name
- KPIGroupID (what group each user should see)
Step 4: Filter the Field Parameter Dynamically
Create a filter measure:
Use this measure as a Top N visual-level filter on KPI visualizations, keeping only those where KPI_Filter = 1.
Step 5: Use USERPRINCIPALNAME() to Detect the Logged-in User
In a measure:
Step 6: Optional – Visual Filter Flags for More Control
Add another column in the KPI parameter table for a visual-level filter:
VisualFilter = 1 // or 0 if you don’t want to show this KPI in some visuals
Use this as a filter where needed (e.g. only show certain KPIs in a line chart but all in cards).
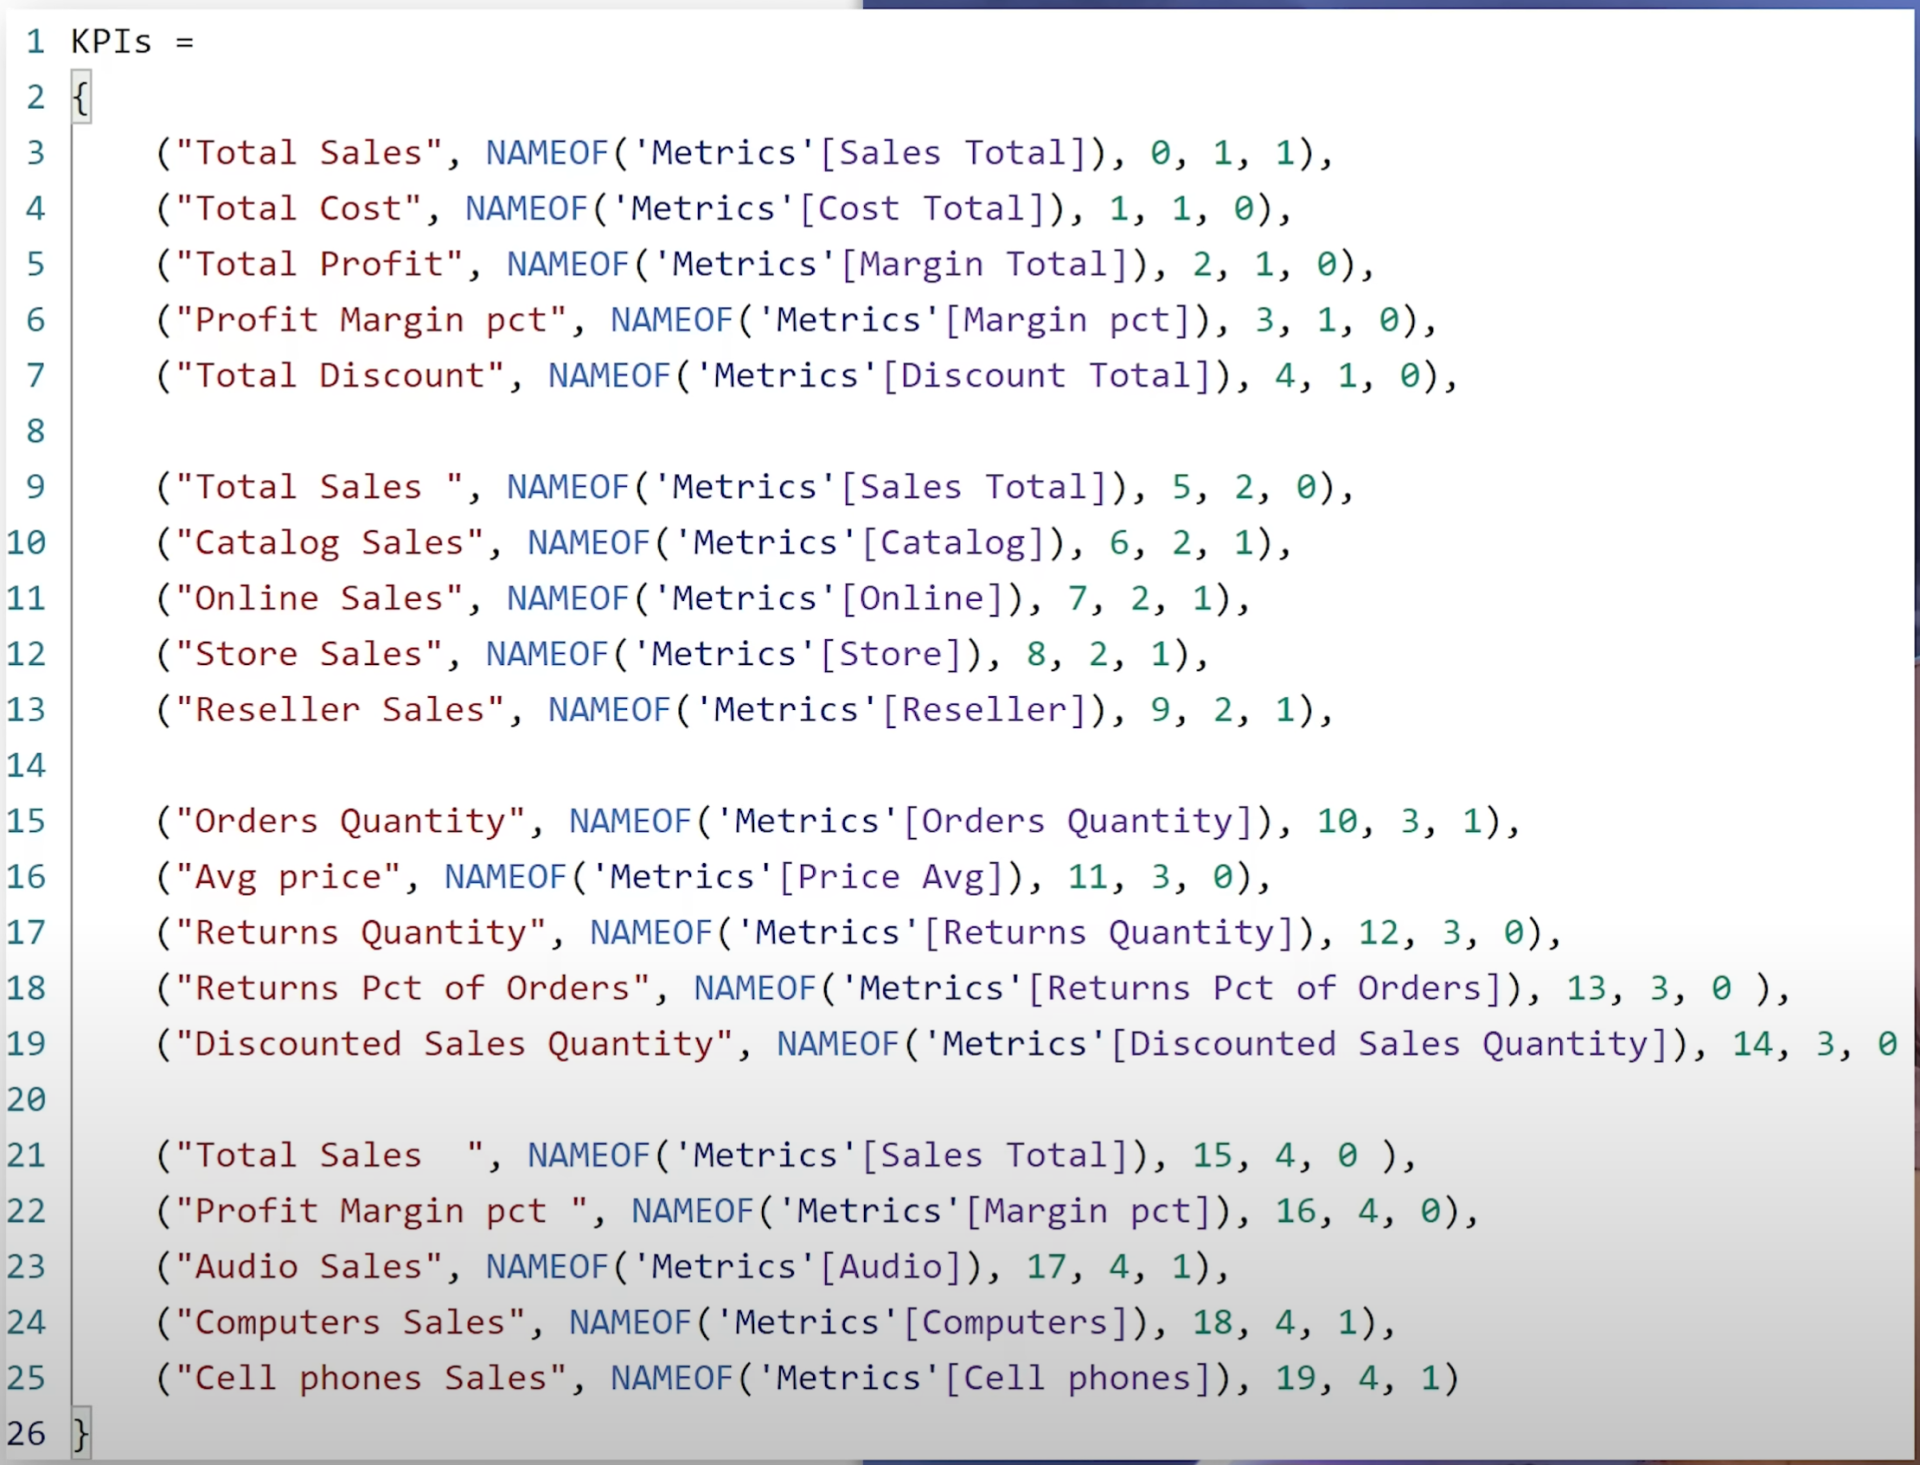
Apply the filter on the line chart visual:
Step 6: Add a Dynamic Title for KPI Group
Create a measure for the chart title based on KPI group:
Use FX > Field value in the chart title settings.
Final Result
When the report is published to the Power BI Service, the logged-in user will automatically see only the KPIs assigned to their group - no extra steps needed.
This is a powerful UX design pattern to personalize reports without overwhelming users.
Hope you like it!
Give it a try and see how it works for you! I’d love to hear what you think or see how you use this trick in your own reports.