Let’s break it down step by step.
Step 1: Prepare Your Data
Start with a basic Employees table that includes:
- Employee Name
- Employee ID
- Manager ID
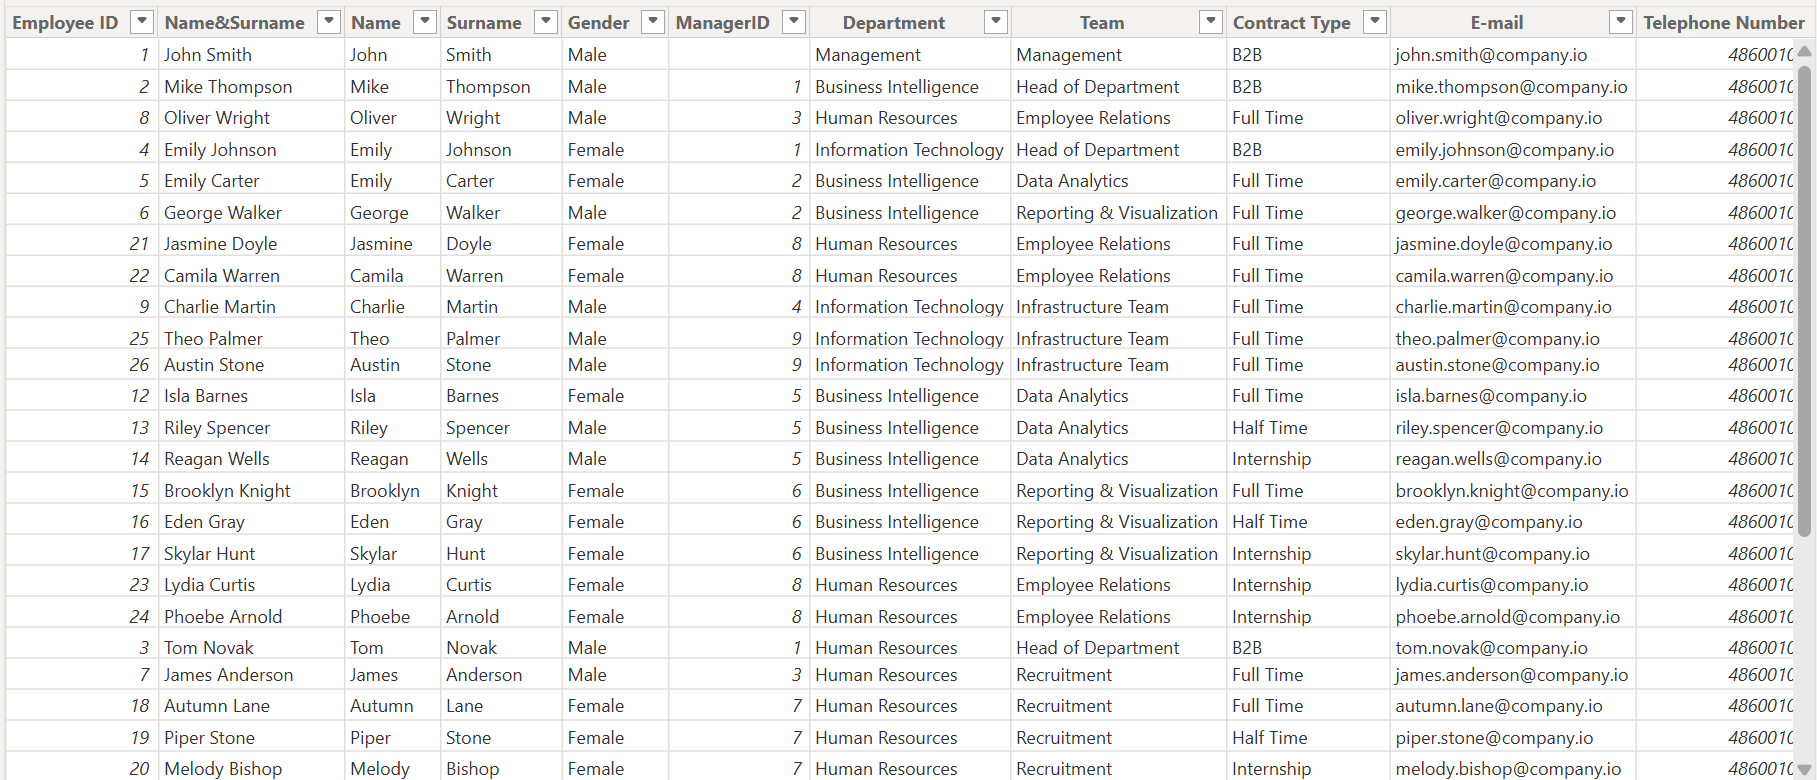
Each employee’s manager is referenced by their ID, allowing you to build the hierarchy.
Step 2: Generate a Hierarchical Path Column
Use the PATH() function to trace the management chain from top to bottom.
Create a new column:

This returns a delimited string showing the reporting chain (e.g. "1|2|5"). But that’s not exactly what I wanted.
Step 3: Extract Individual Levels with PATHITEM and LOOKUPVALUE
To visualize hierarchy levels like CEO → Manager → Analyst, use PATHITEM() and LOOKUPVALUE().
Example for Level 2 Manager:
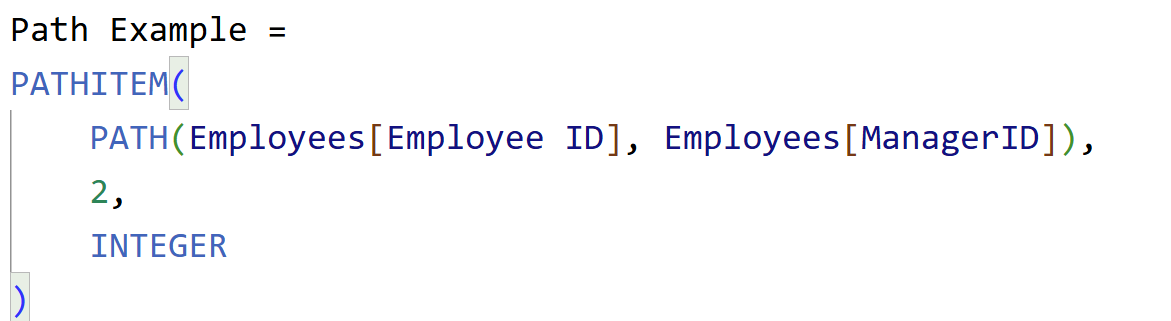
Level 2 Manager Name
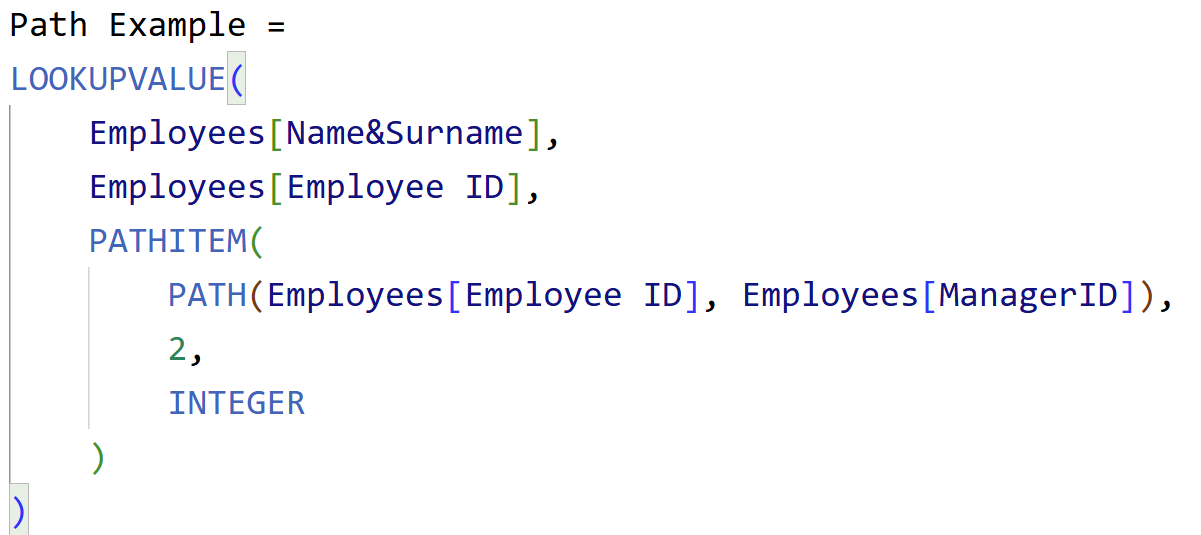
Repeat for Levels 1, 3, 4, etc., adjusting the index in PATHITEM.
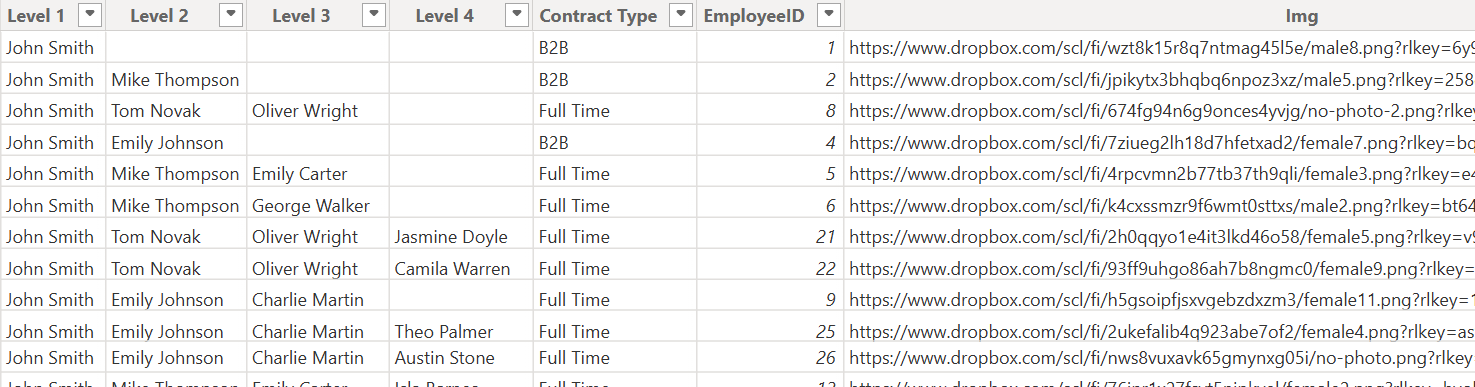
Step 4: View Hierarchy in a Matrix
- Add a Matrix visual.
- Drag Level 1, Level 2, Level 3, etc. to rows.
- Enable drill down via the "+" icons or Expand All.
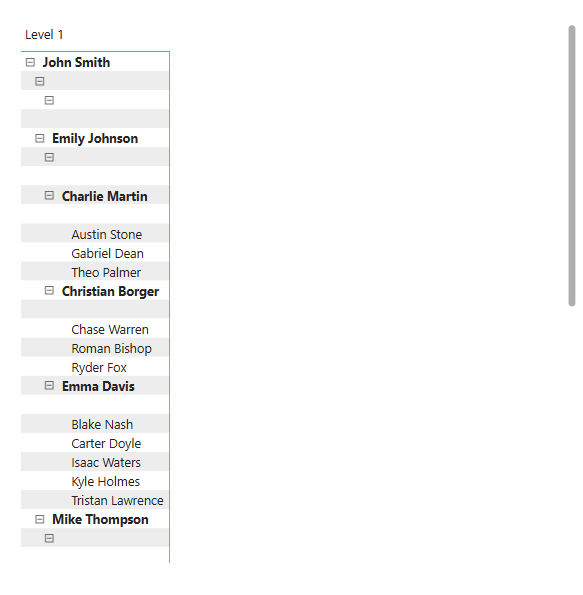
Optional:
- Apply filters to hide blank levels using the visual filter panel (e.g., Level 4 is not blank).
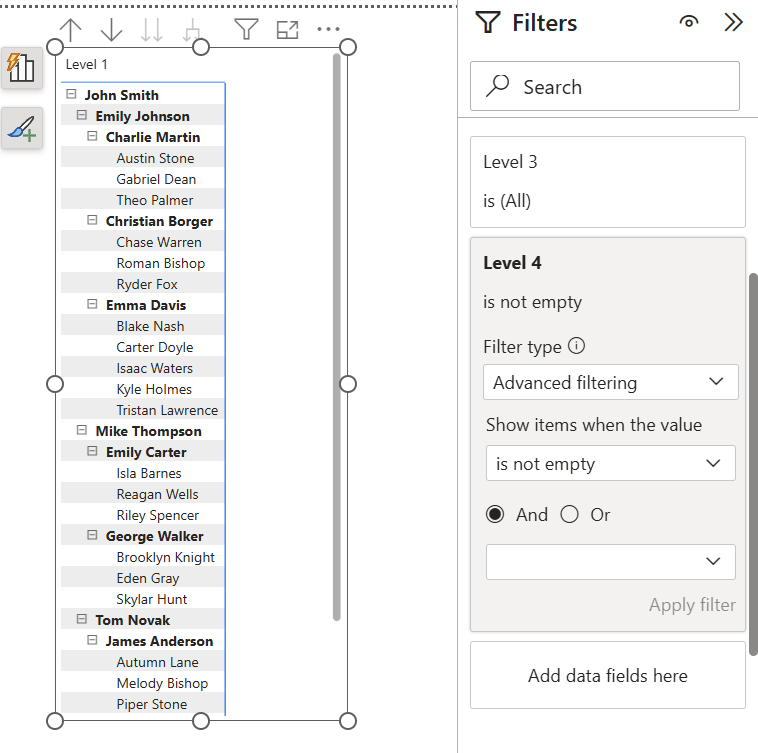
Step 5: Switch to a Decomposition Tree
Now for the real magic,
- Add the Decomposition Tree visual.
- Drag Level 1 to the "Analyze" field.
- Click the + icon to drill into Level 2, Level 3, etc.
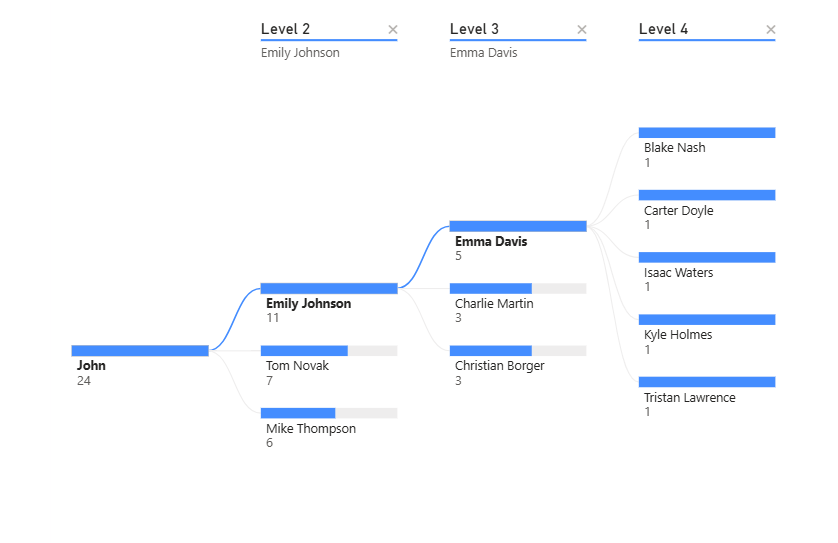
This creates an intuitive, collapsible view of your org chart.
Step 6: Hide Default Counts and Clean the Visual
Power BI automatically adds counts of employees under each level. If you want only the names:
- Go to Format > Values.
- Set Font Color to match Background (hides the text).
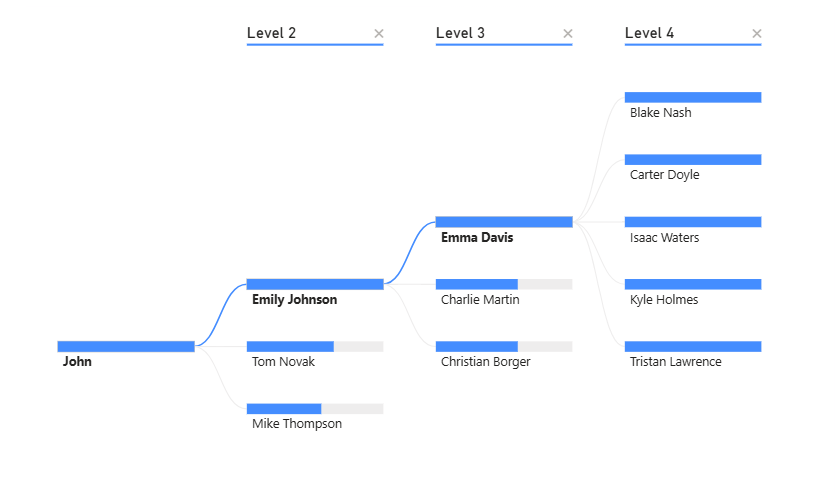
Step 7: Add Department Slicer
Overlay the chart header with a slicer to filter by department.
- Add a slicer with the Department field.
- Format it as tile or button layout.
- Position it over unwanted default labels (acts as a mask).
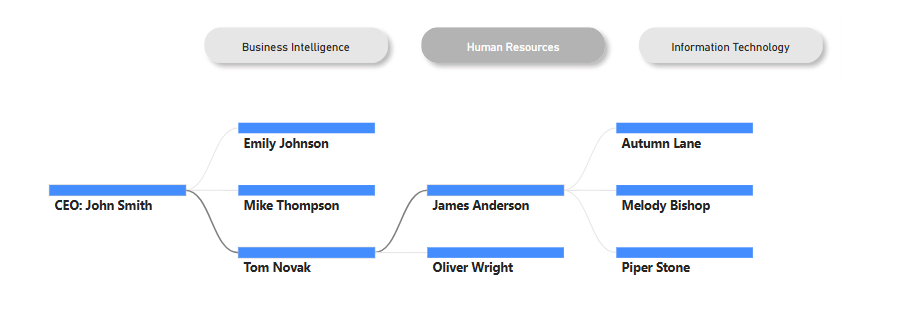
Step 8: Normalize Bar Widths
To make bar widths equal (for design clarity):
- Change aggregation to "Count (Distinct)"
- This removes scaling based on team size
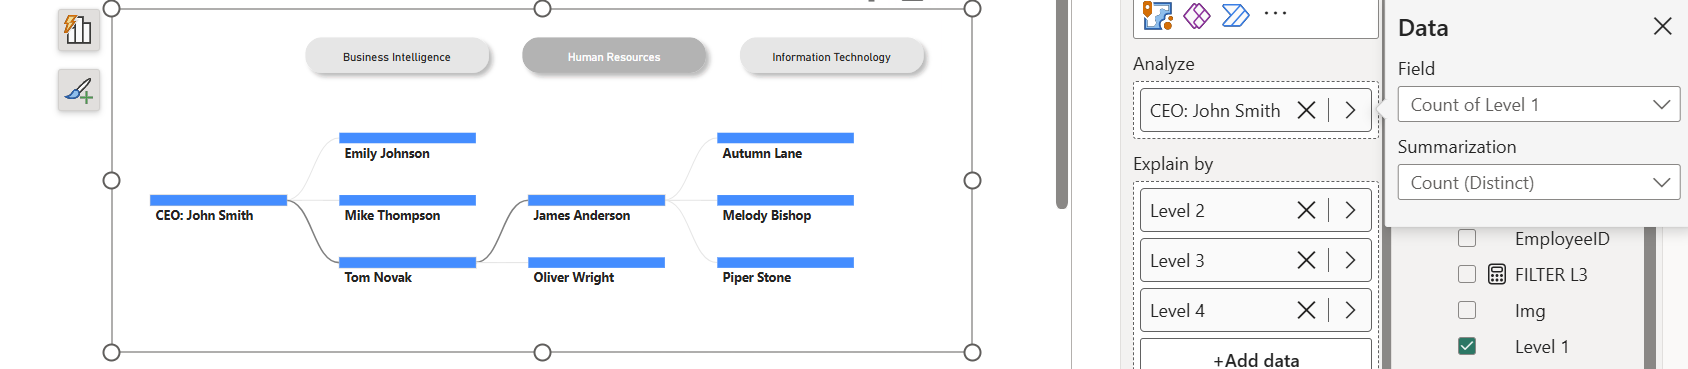
Step 9: Apply Conditional Formatting (e.g., Full-time vs Part-time)
1. Create a measure:
CF Contract Type =
SWITCH(TRUE(),
Employees[Contract Type] = "Full-time", "#4CAF50",
Employees[Contract Type] = "Part-time", "#FF9800",
"#9E9E9E"
)
2. Apply it under Formatting > Conditional Formatting > Data Bars
→ Use Field value → Choose the CF measure.
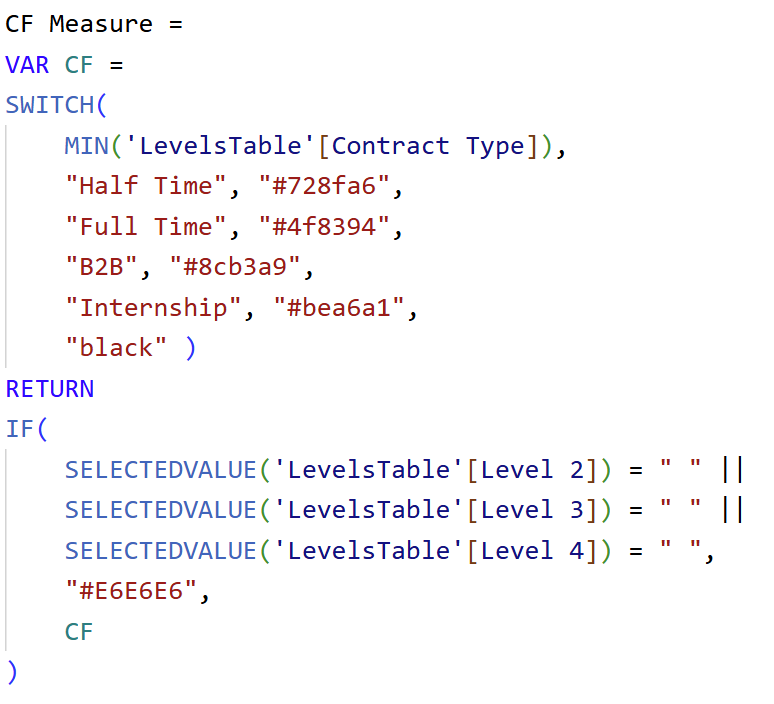
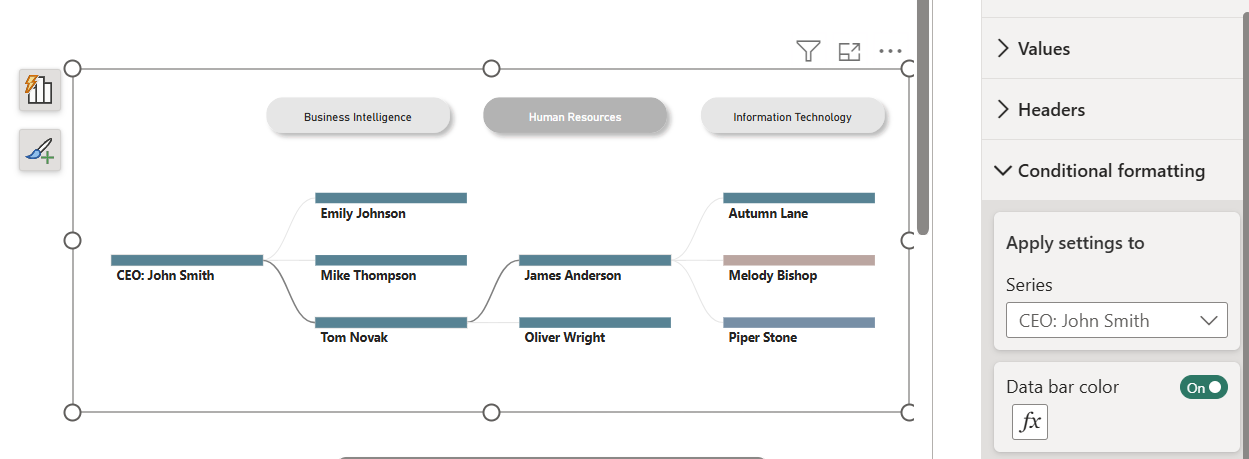
Step 10: Clean Up Connector Lines and Add Custom Tooltips
- Connector color: Go to Tree > Connectors, set to dark gray.
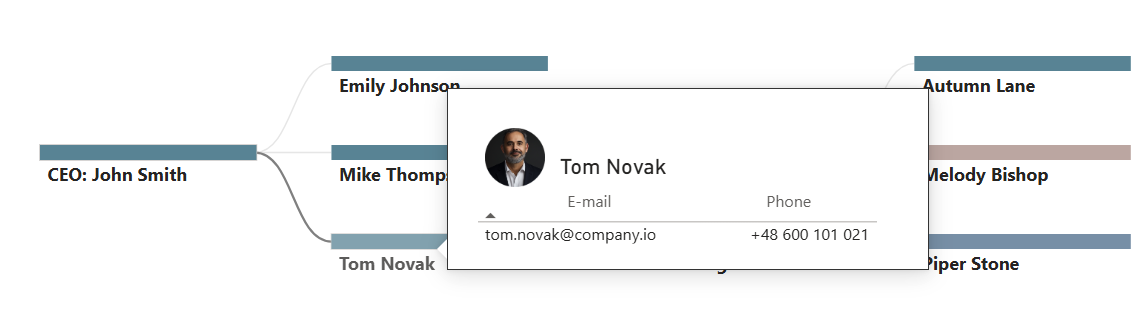
- Tooltips: Create a report page with:
- Employee photo
- Email, phone
- Key competencies
Assign the page as a custom tooltip for the Decomposition Tree.
Final Result
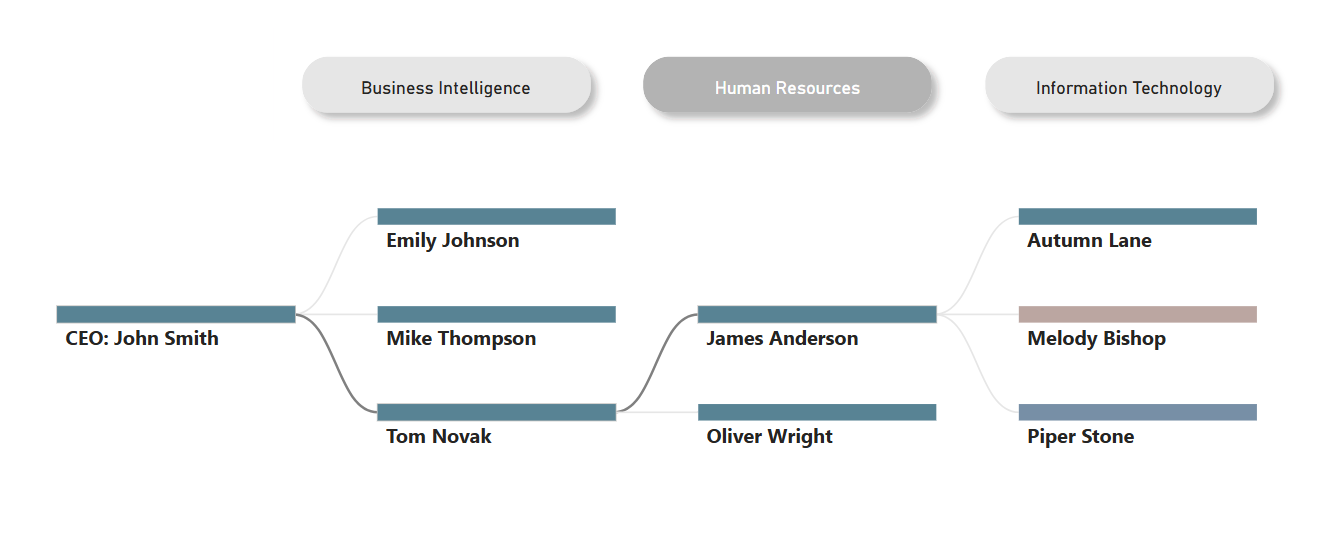
Now you have a beautiful, fully interactive org chart:
- Drillable from CEO to analyst
- Filterable by department
- Colored by contract type
- Enhanced with custom employee tooltips
Optional Limitations and Workarounds
- Tooltips may not appear properly for the top level (e.g. CEO).
- Use an empty text box overlay to mask placeholder tooltips.
Hope you like it!
Give it a try and see how it works for you! I’d love to hear what you think or see how you use this trick in your own reports.