This tutorial walks you through how to build a reusable method to highlight any custom time period inside a chart, using only native Power BI features.
Step 1: Use the Chart Background LayerPower BI now supports
layering visuals, so you can use a secondary column chart as a
background highlight for your main line chart.
- Insert a line and clustered column chart.
- Bind it to the date field (e.g. dimDate[Date]).
- Create a column in the date table that returns 1 only if the date is within your target range (weekends or holidays).
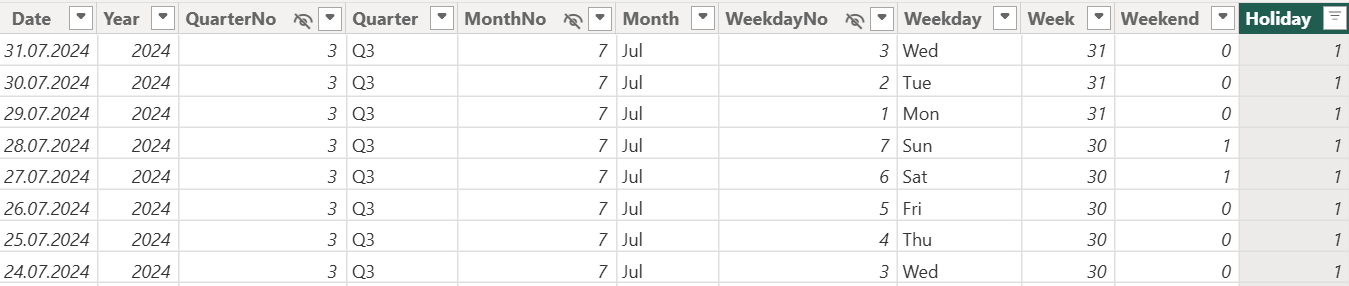
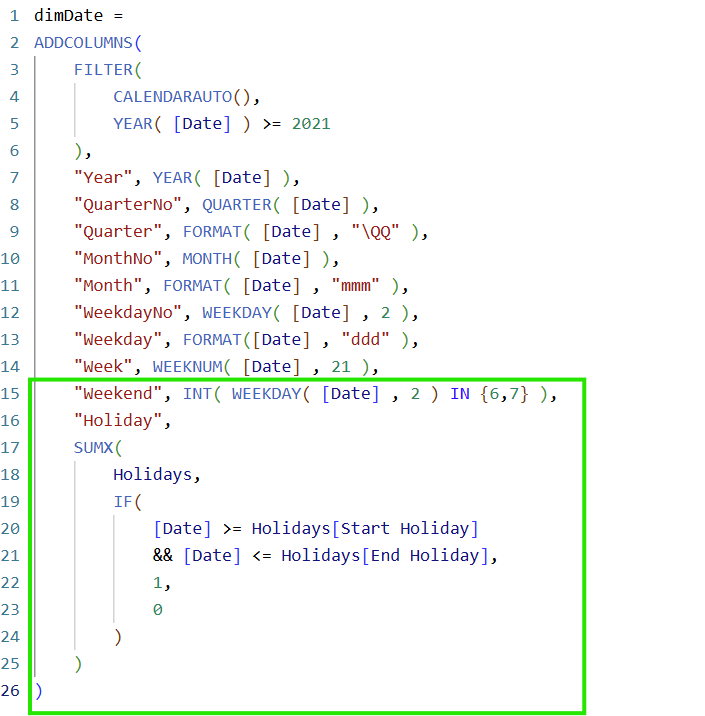
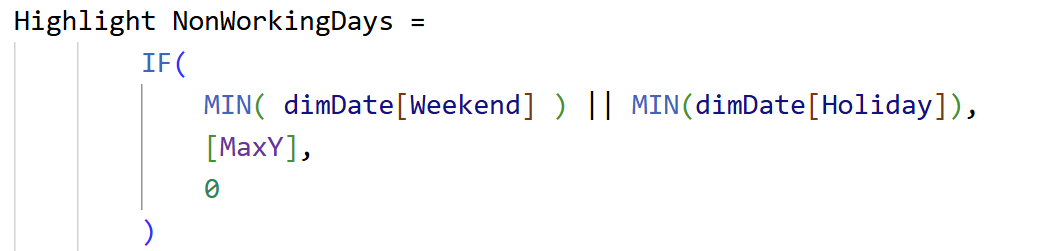
4. Create highlighting measures like and place them on the column y-axis:
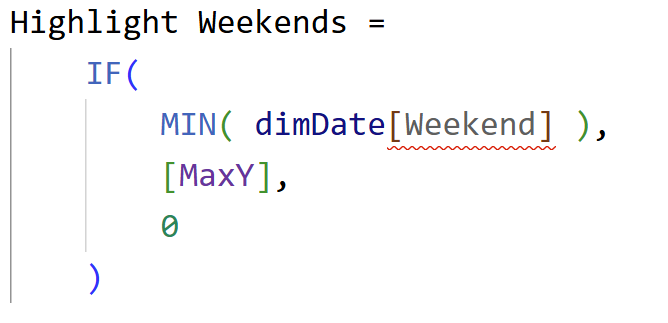
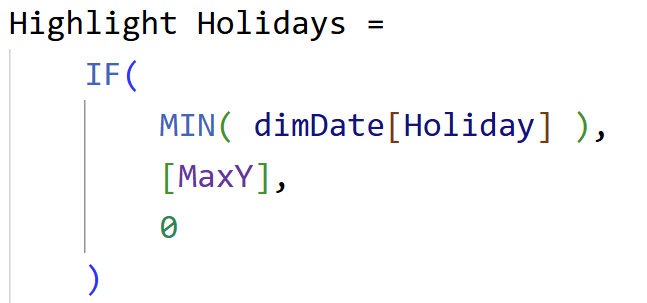
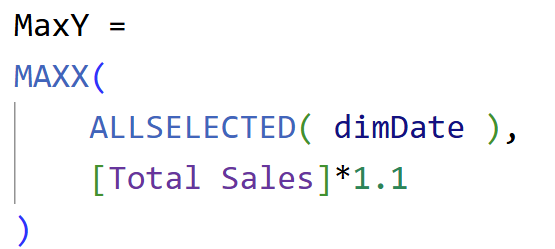
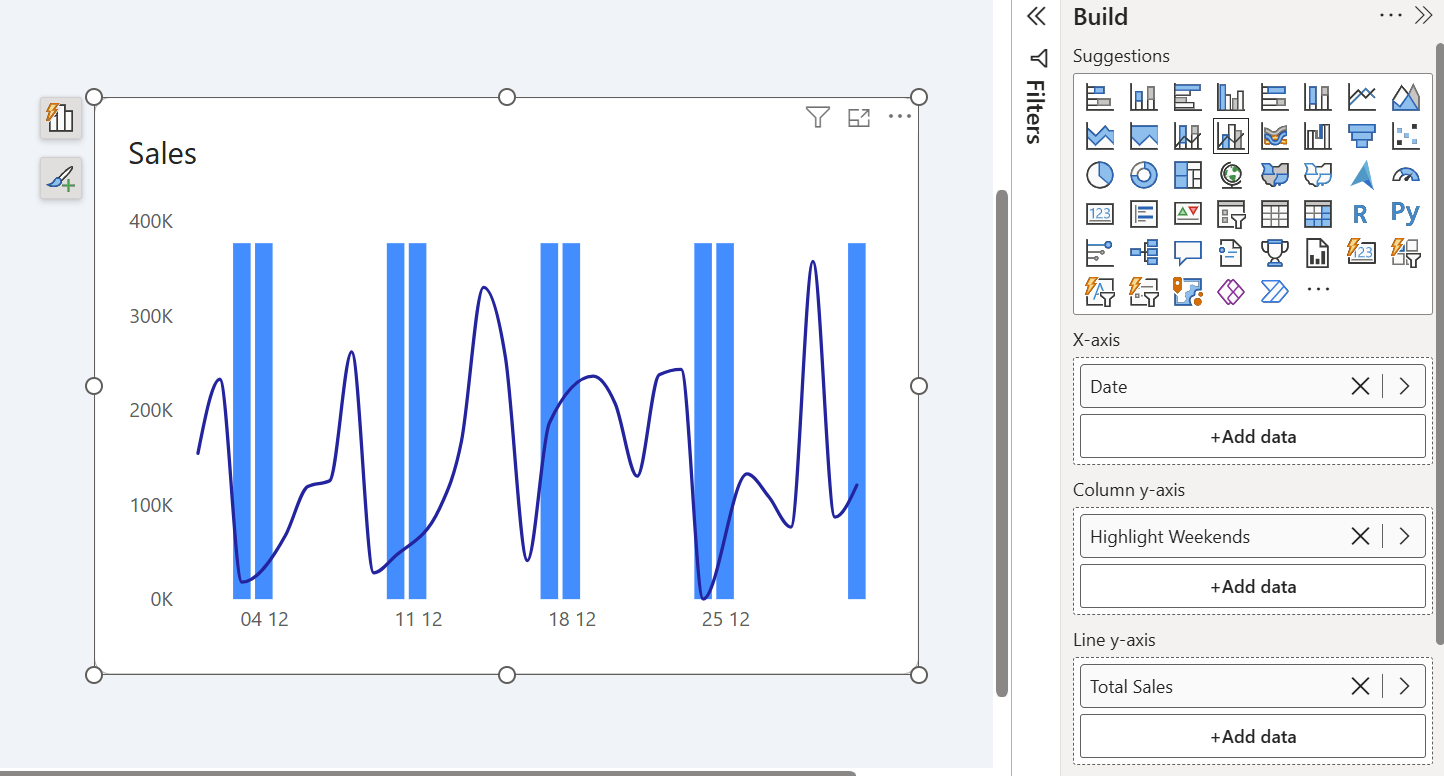
Note: highlighting the holidays would follow similar approach.
Step 2: Format the Highlight Layer
Style the combo chart:
- Set bar color to something soft (e.g., light blue)
- Reduce the bar width for subtlety by putting the space between the categories to 0%
- Turn off data labels
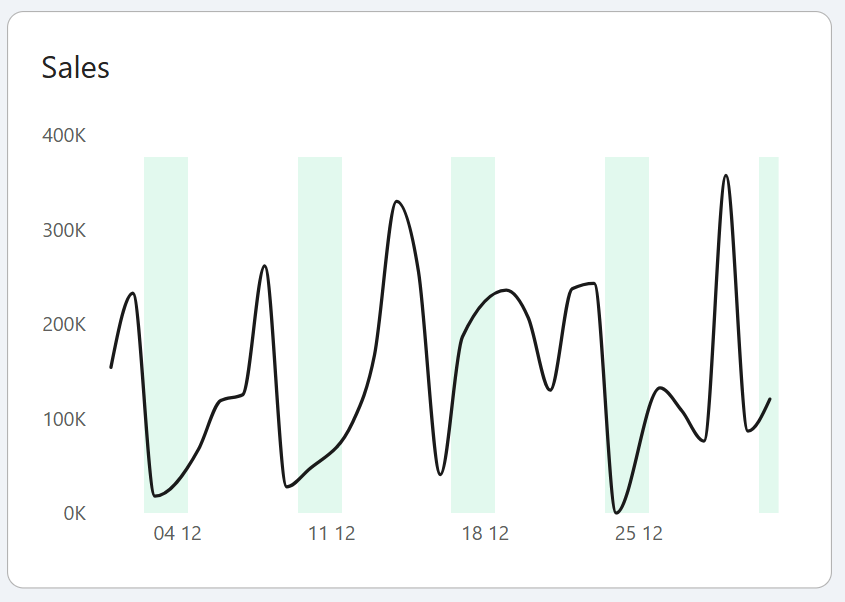
Step 3: Adding the slicer buttons
1. Create the disconnected table
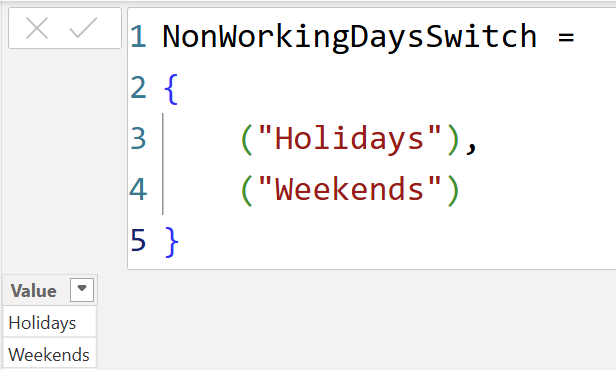
2. Use the Value column as a slicer and format the slicer
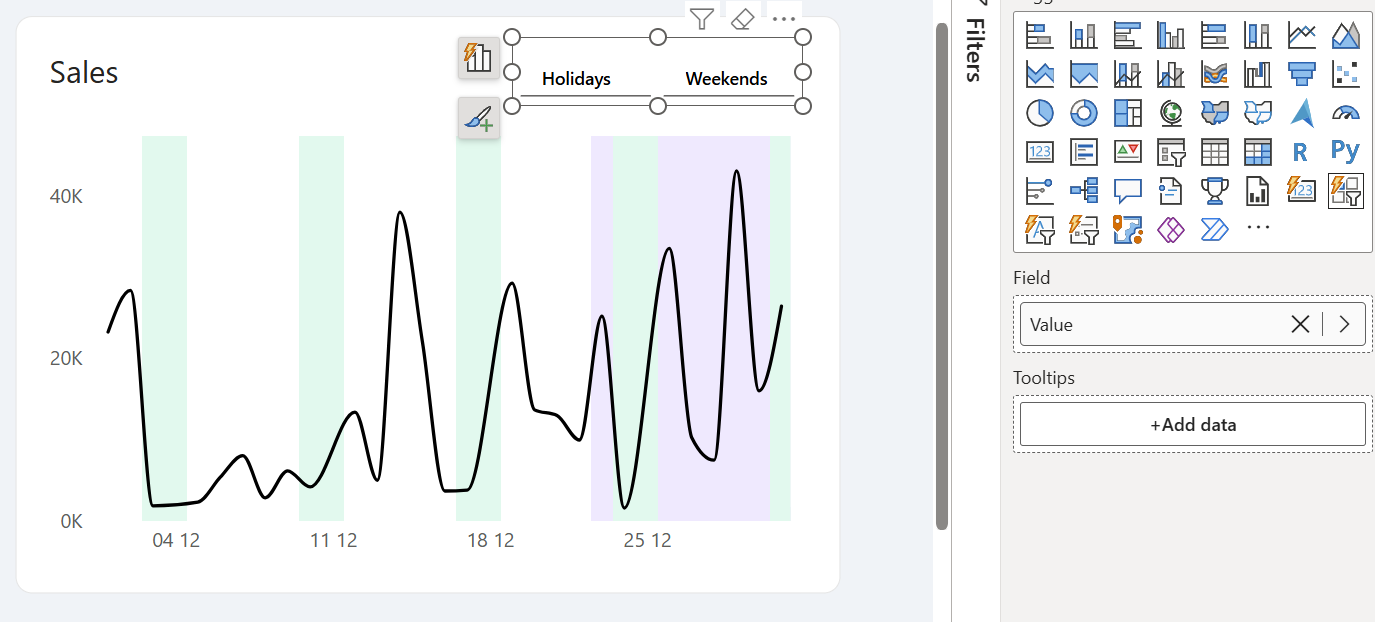
3. Create a new highlight measure or adjust the previous one, make sure you place it on the y-axis to make the slicer work
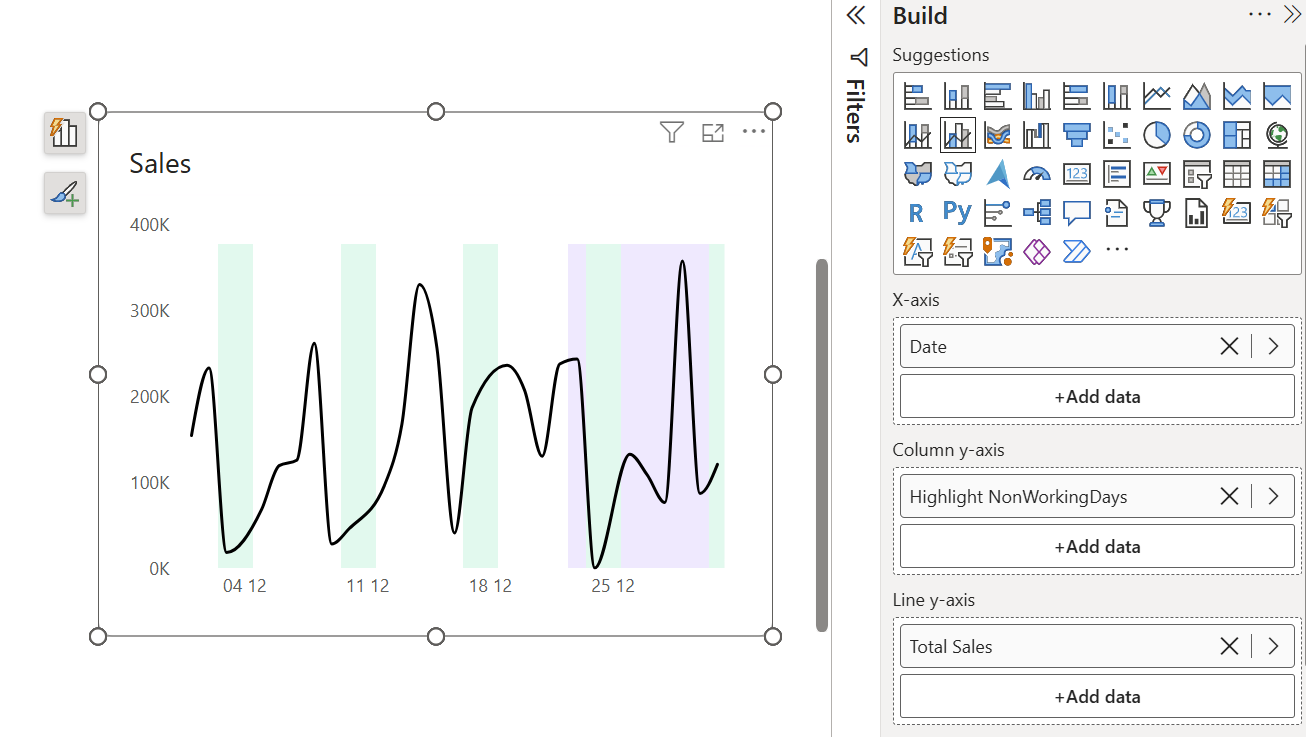
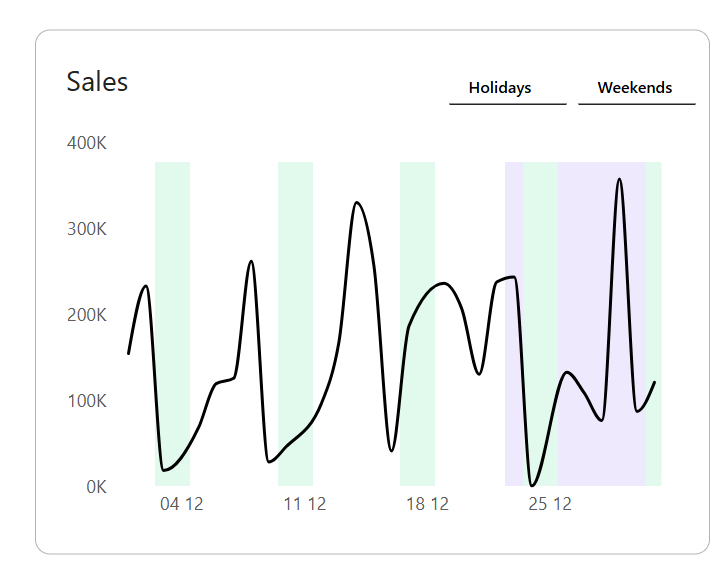
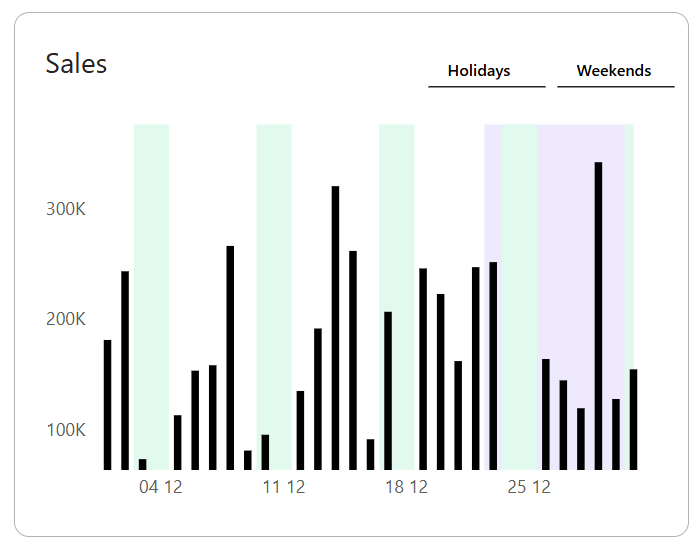
Result: a clean visual with highlighted periods directly beneath the data line.
In
this video I also explain how to build this column alternative:
Why This Matters for UX
- This approach doesn’t add clutter or distract from the data.
- It improves readability by subtly guiding the user’s focus.
- You don’t need custom visuals or bookmarks - it’s fully native and reusable.
- You can bind the highlight logic to user selections, KPIs, or time intelligence filters.
This is a simple but impactful way to boost clarity and storytelling in your Power BI dashboards.
Hope you like it!
Give it a try and see how it works for you! I’d love to hear what you think or see how you use this trick in your own reports.