Step 1: Start With a Standard Scatter PlotCreate a scatter plot by placing your entities on two metrics. For example, vendors can be rated based on:
- X-axis: Market Foresight
- Y-axis: Operational Excellence
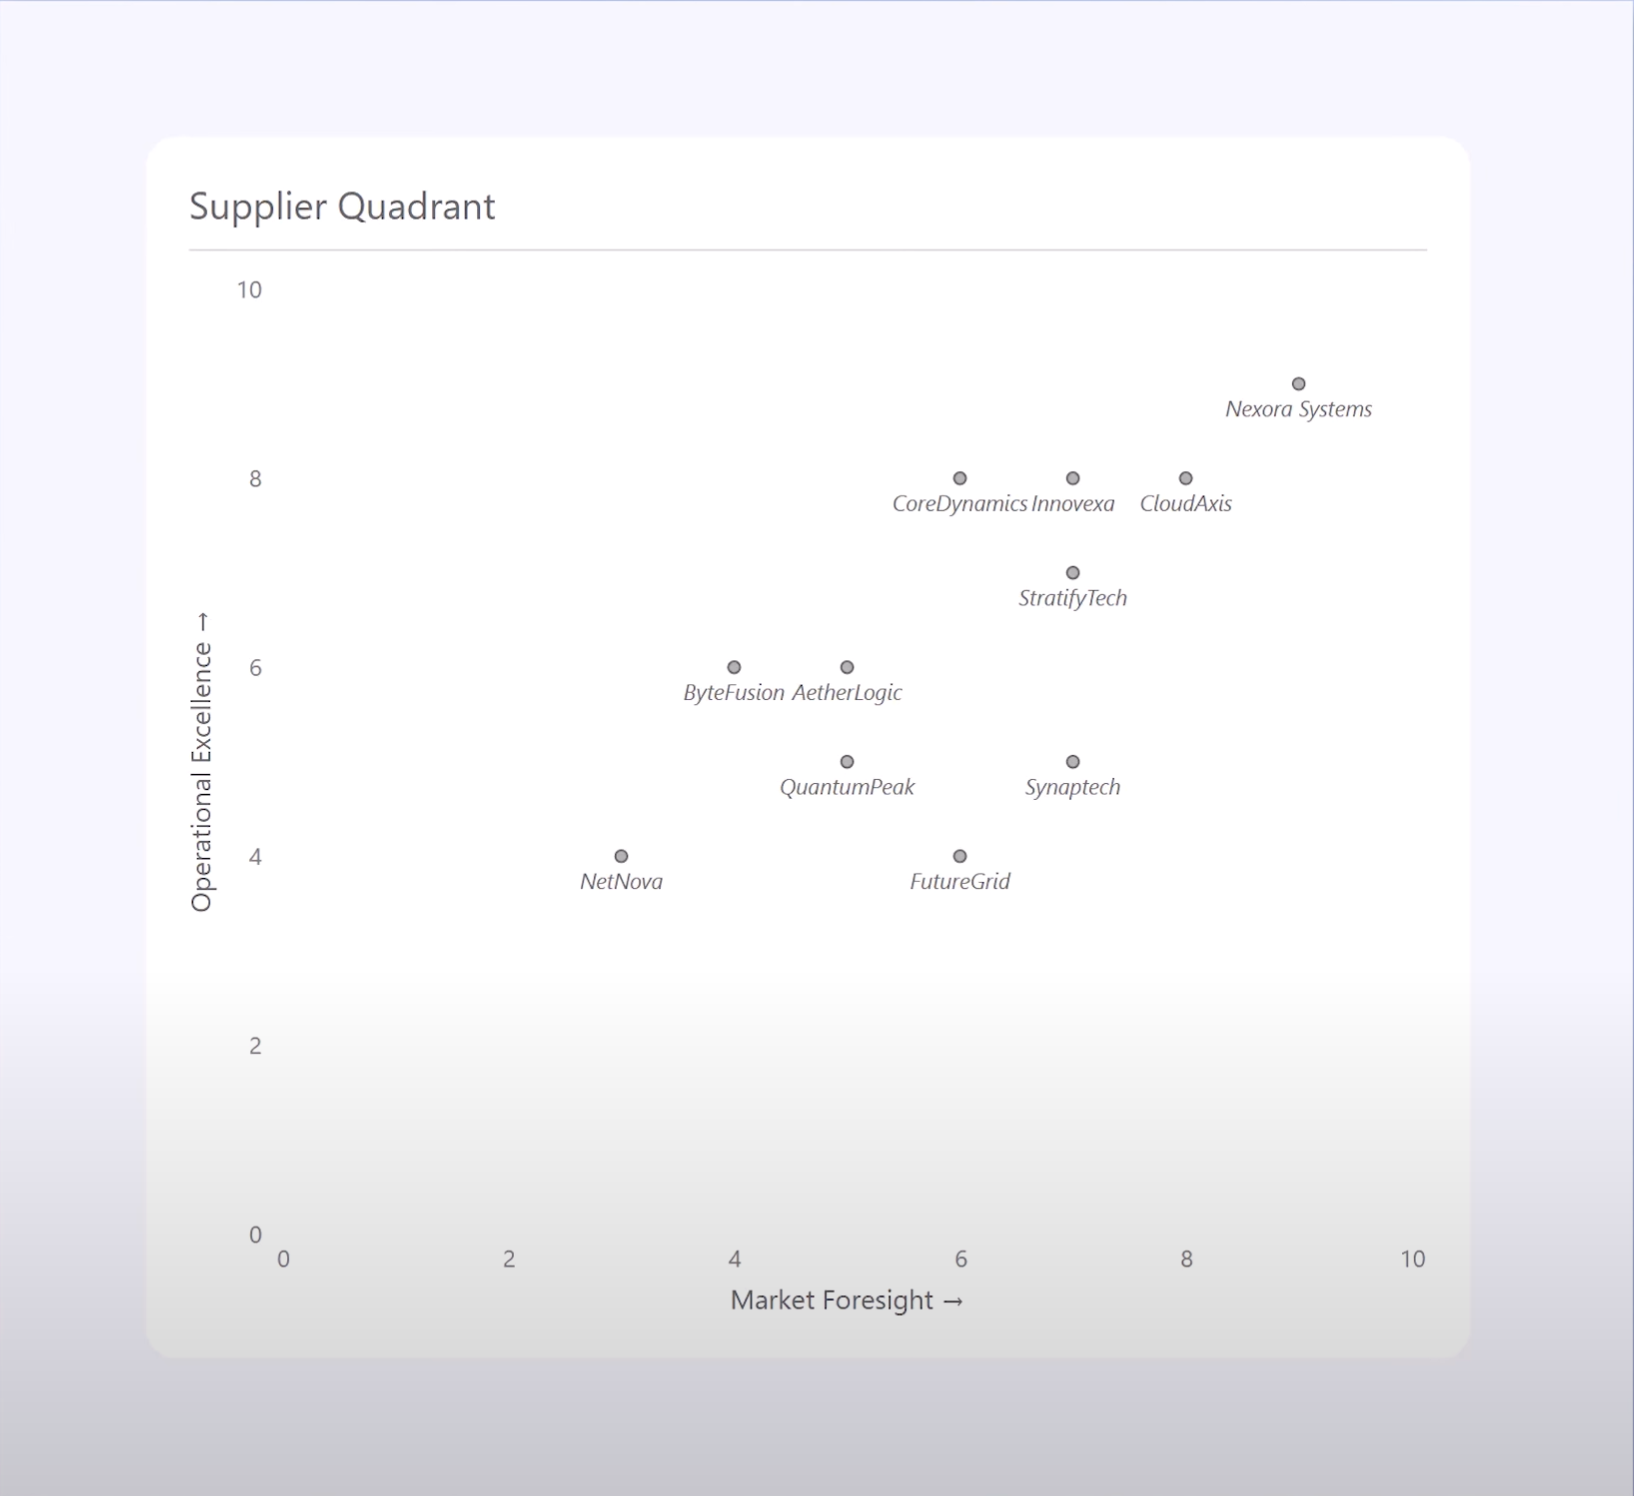
This visual alone gives a sense of distribution, but it's hard to interpret at a glance. That's where quadrants come in.
Step 2: Add Reference Lines for Quadrant DivisionUse
reference lines to divide the plot into quadrants.
Add X-axis Line (Vertical Division)
- Go to Format pane > Reference lines
- Add a new X-axis constant line
- Set its value to 5 (or midpoint of your data)
- Set line width = 0 to make it invisible
- Enable shaded area and set position to Before
- Choose a color (e.g., gray)
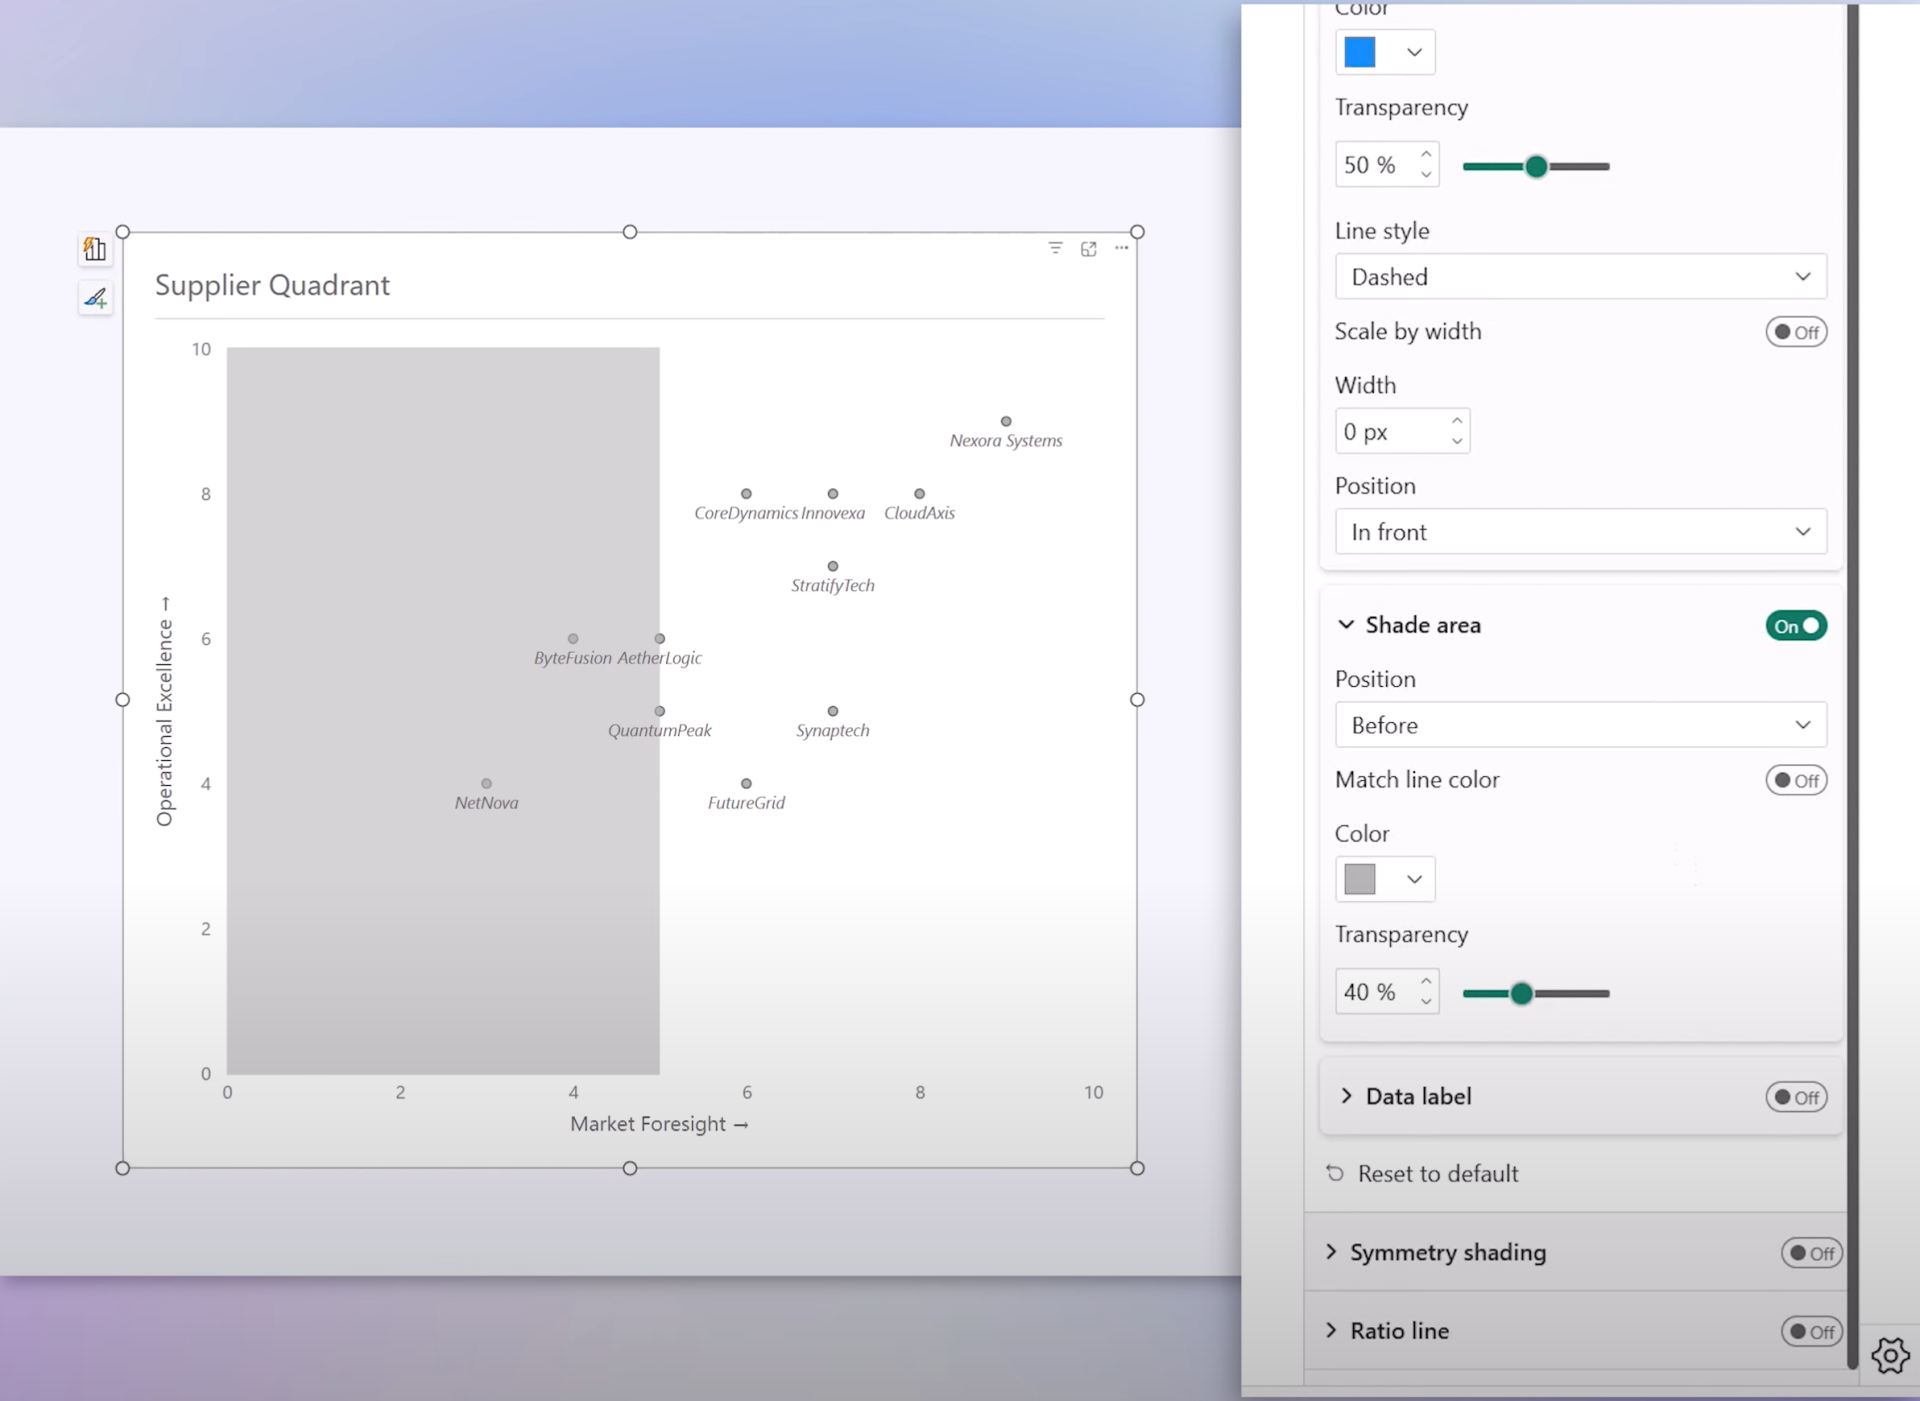
Repeat with a second X-axis line:
- Same position: 5
- Shading: After
- Choose a different color (e.g., yellow)
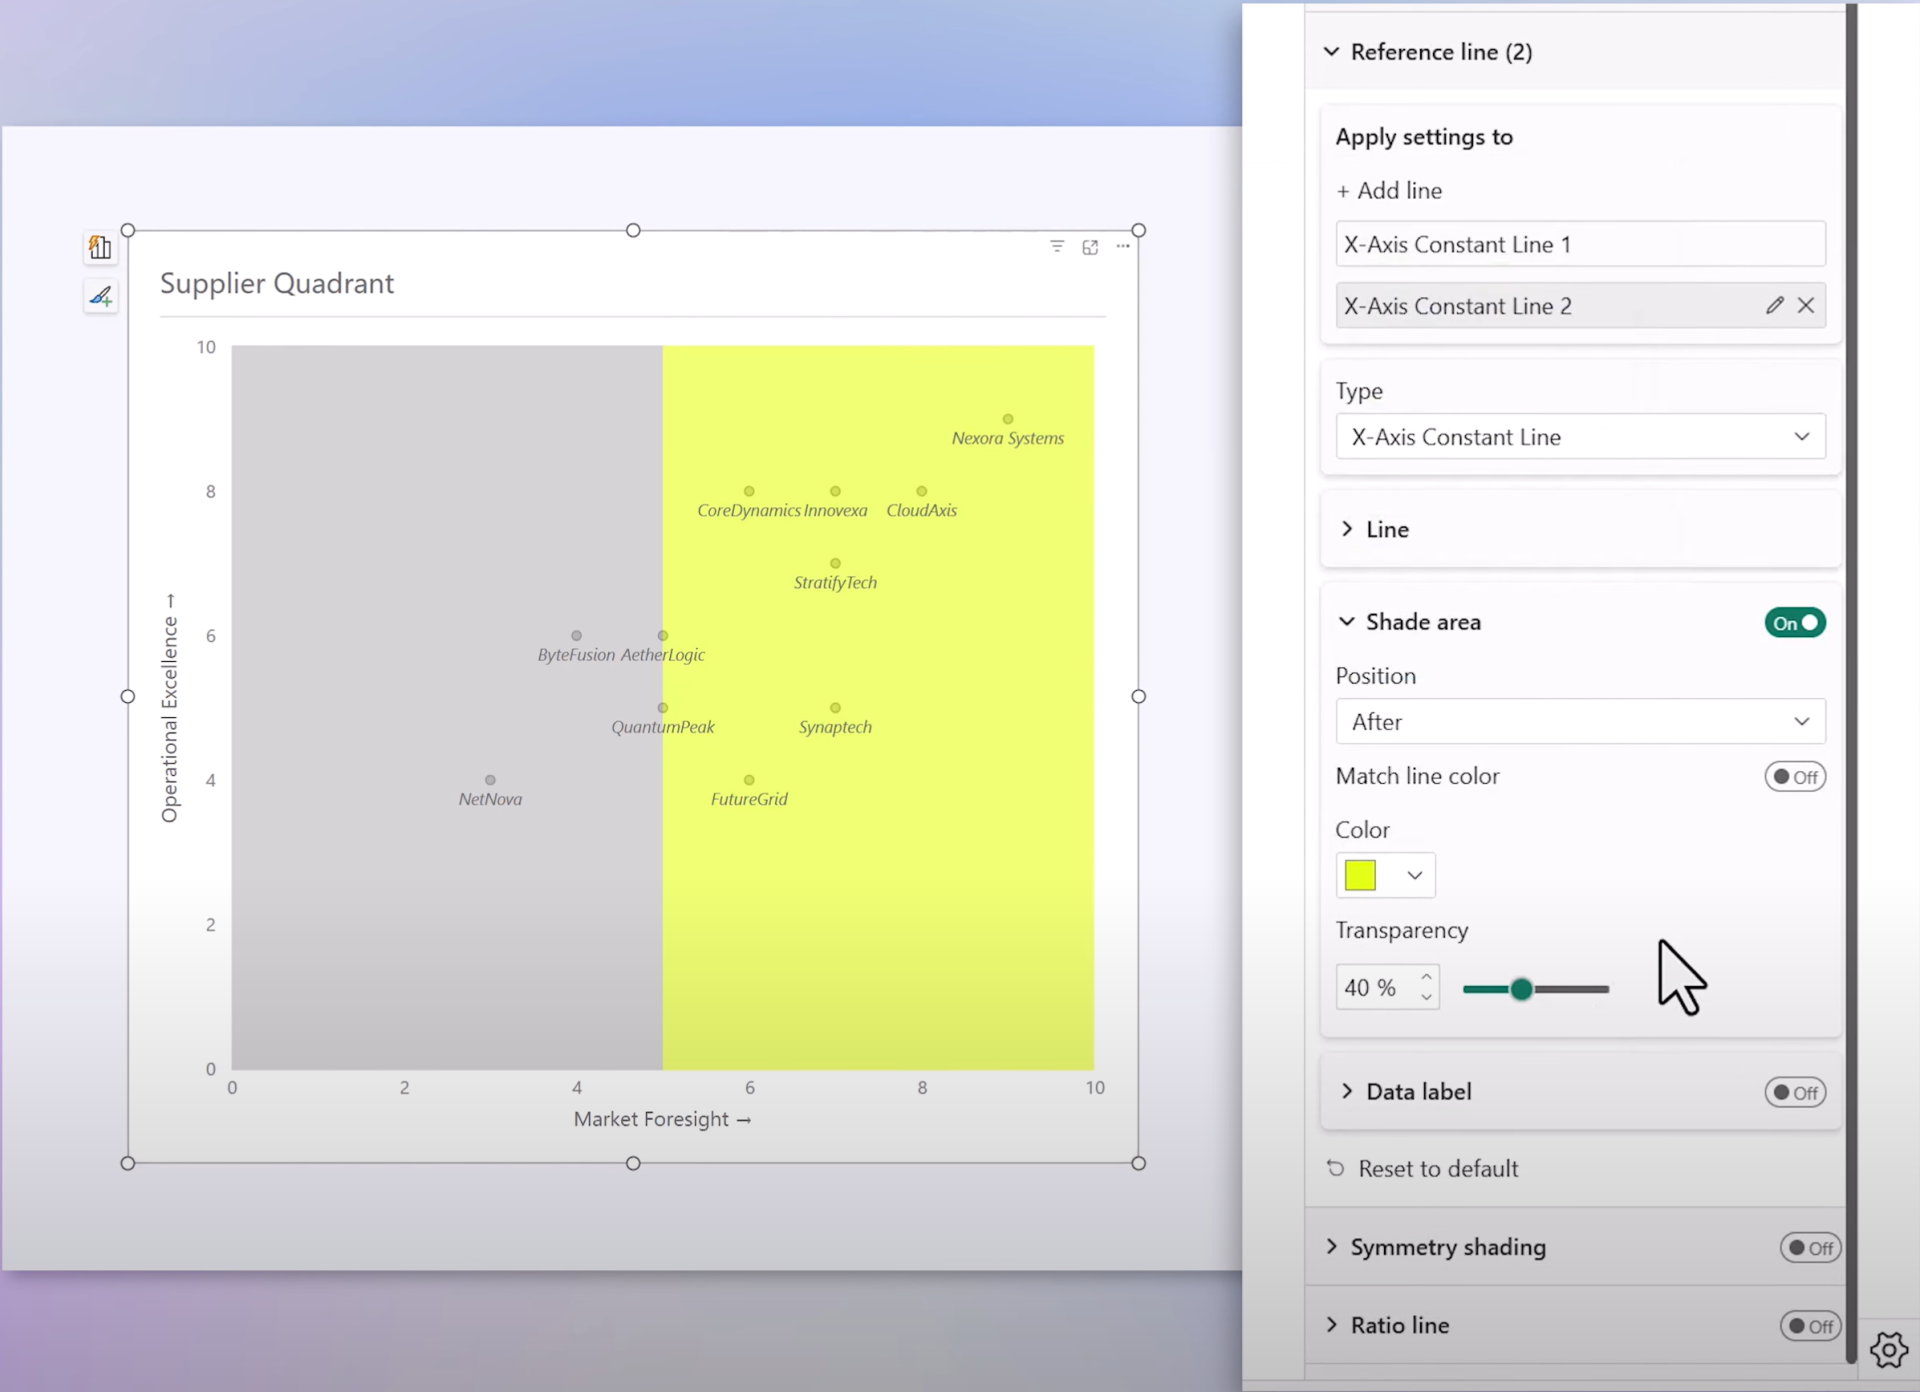
Step 3: Add Y-axis Reference Line
- Add a new Y-axis constant line
- Set position: 5
- Line width = 0
- Enable shaded area
- Position = After
- Choose another color (e.g., blue)
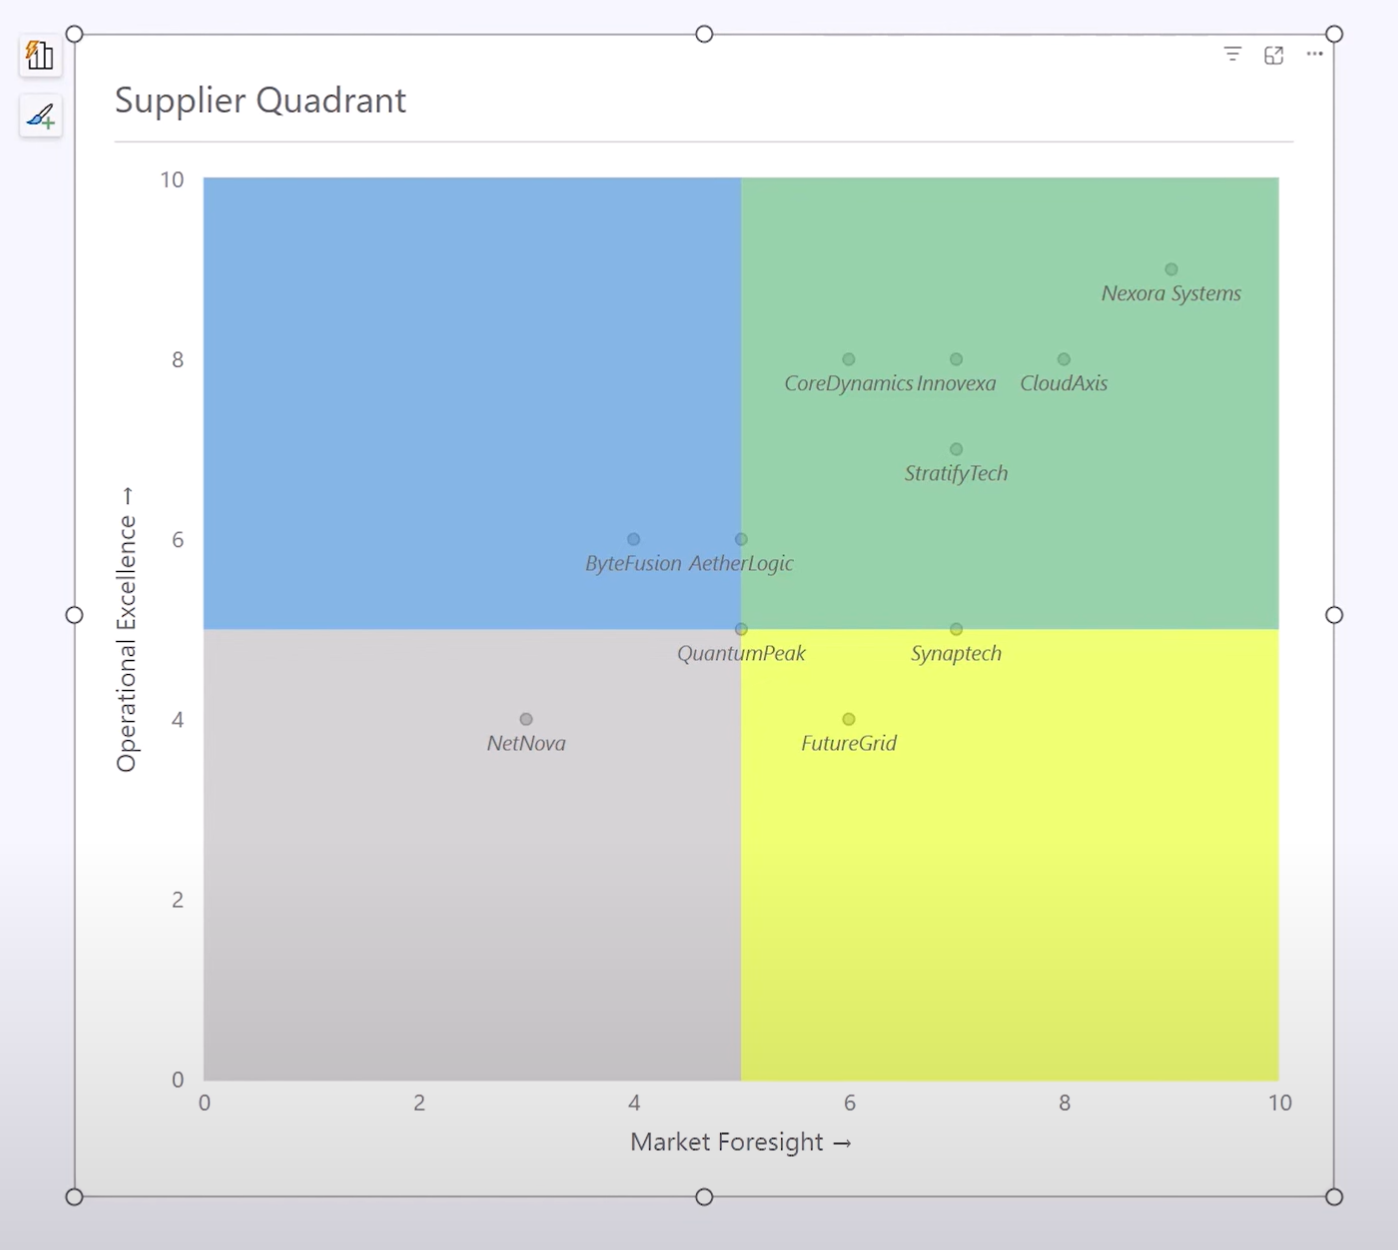
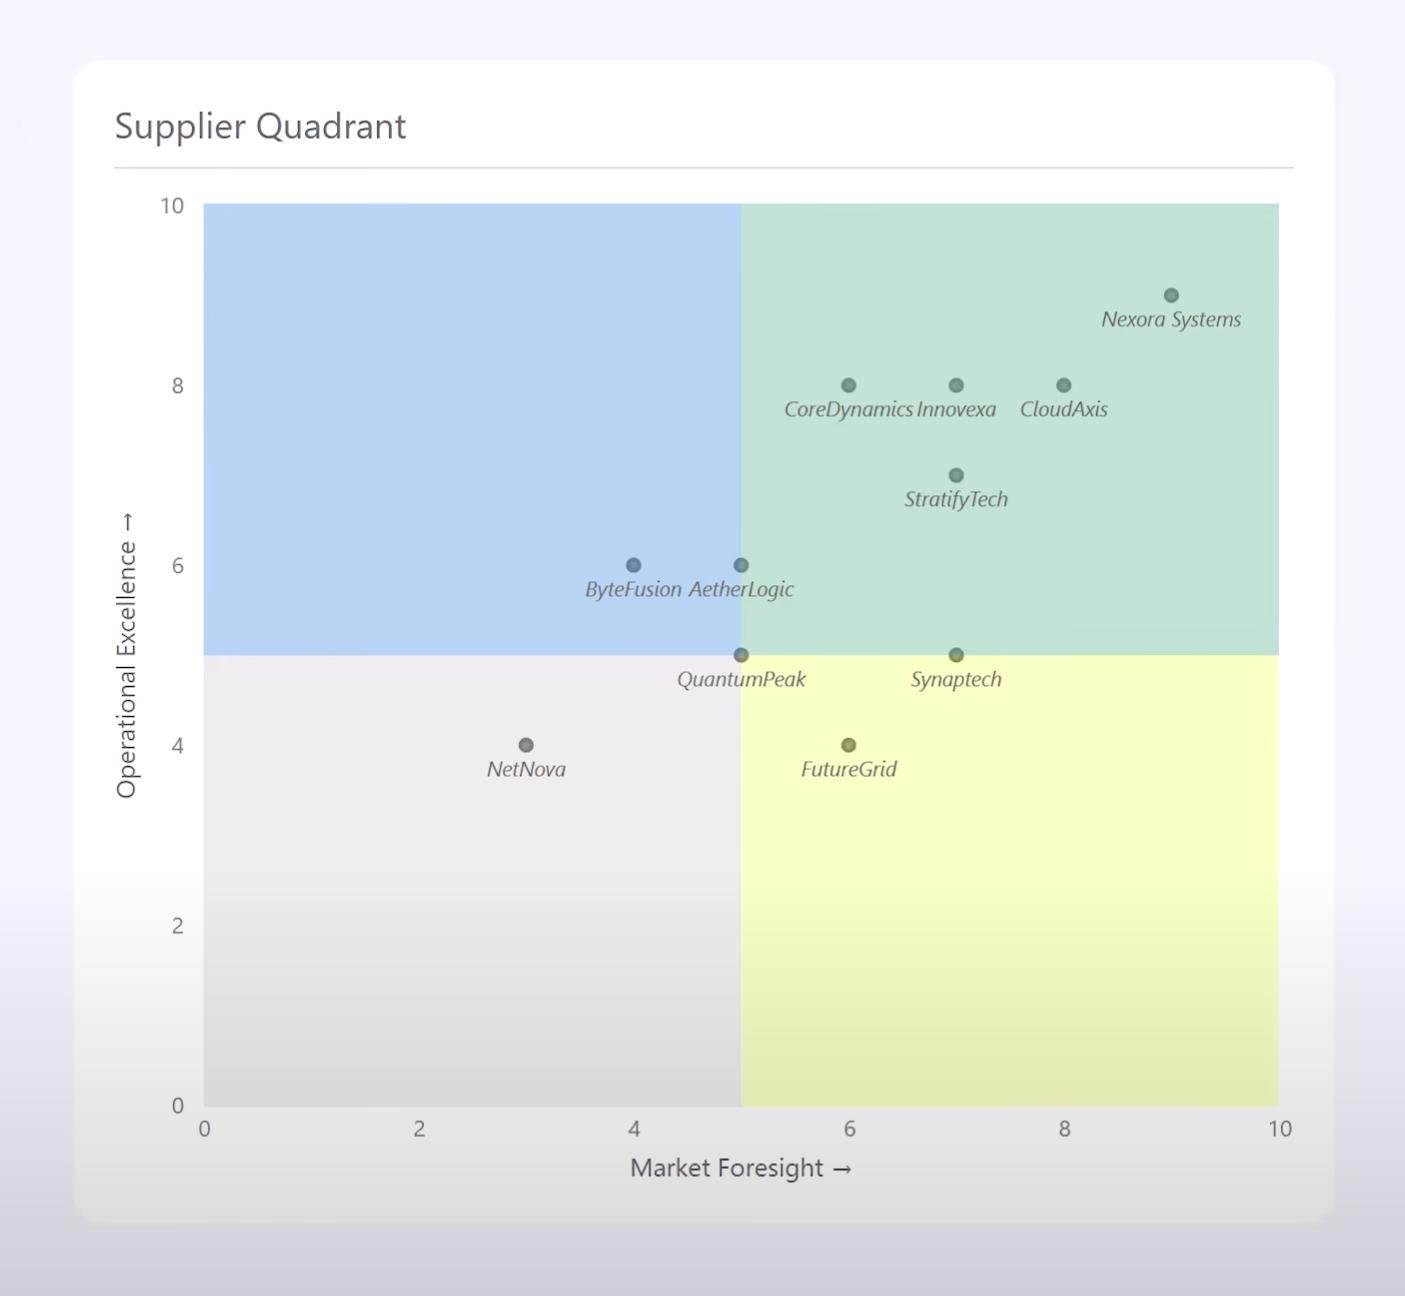
You now see four distinct quadrants thanks to overlapping shaded areas. Mix your colors smartly – for example, yellow and blue blend into green in the top-right quadrant.
Step 4: Adjust Visual Aesthetics
To make your scatter plot easier to read:
- Increase marker transparency to better view dots
- Style markers (shape, size, border)
- Adjust shading transparency to ~75%
Step 5: Make Quadrants Dynamic with ParametersUse
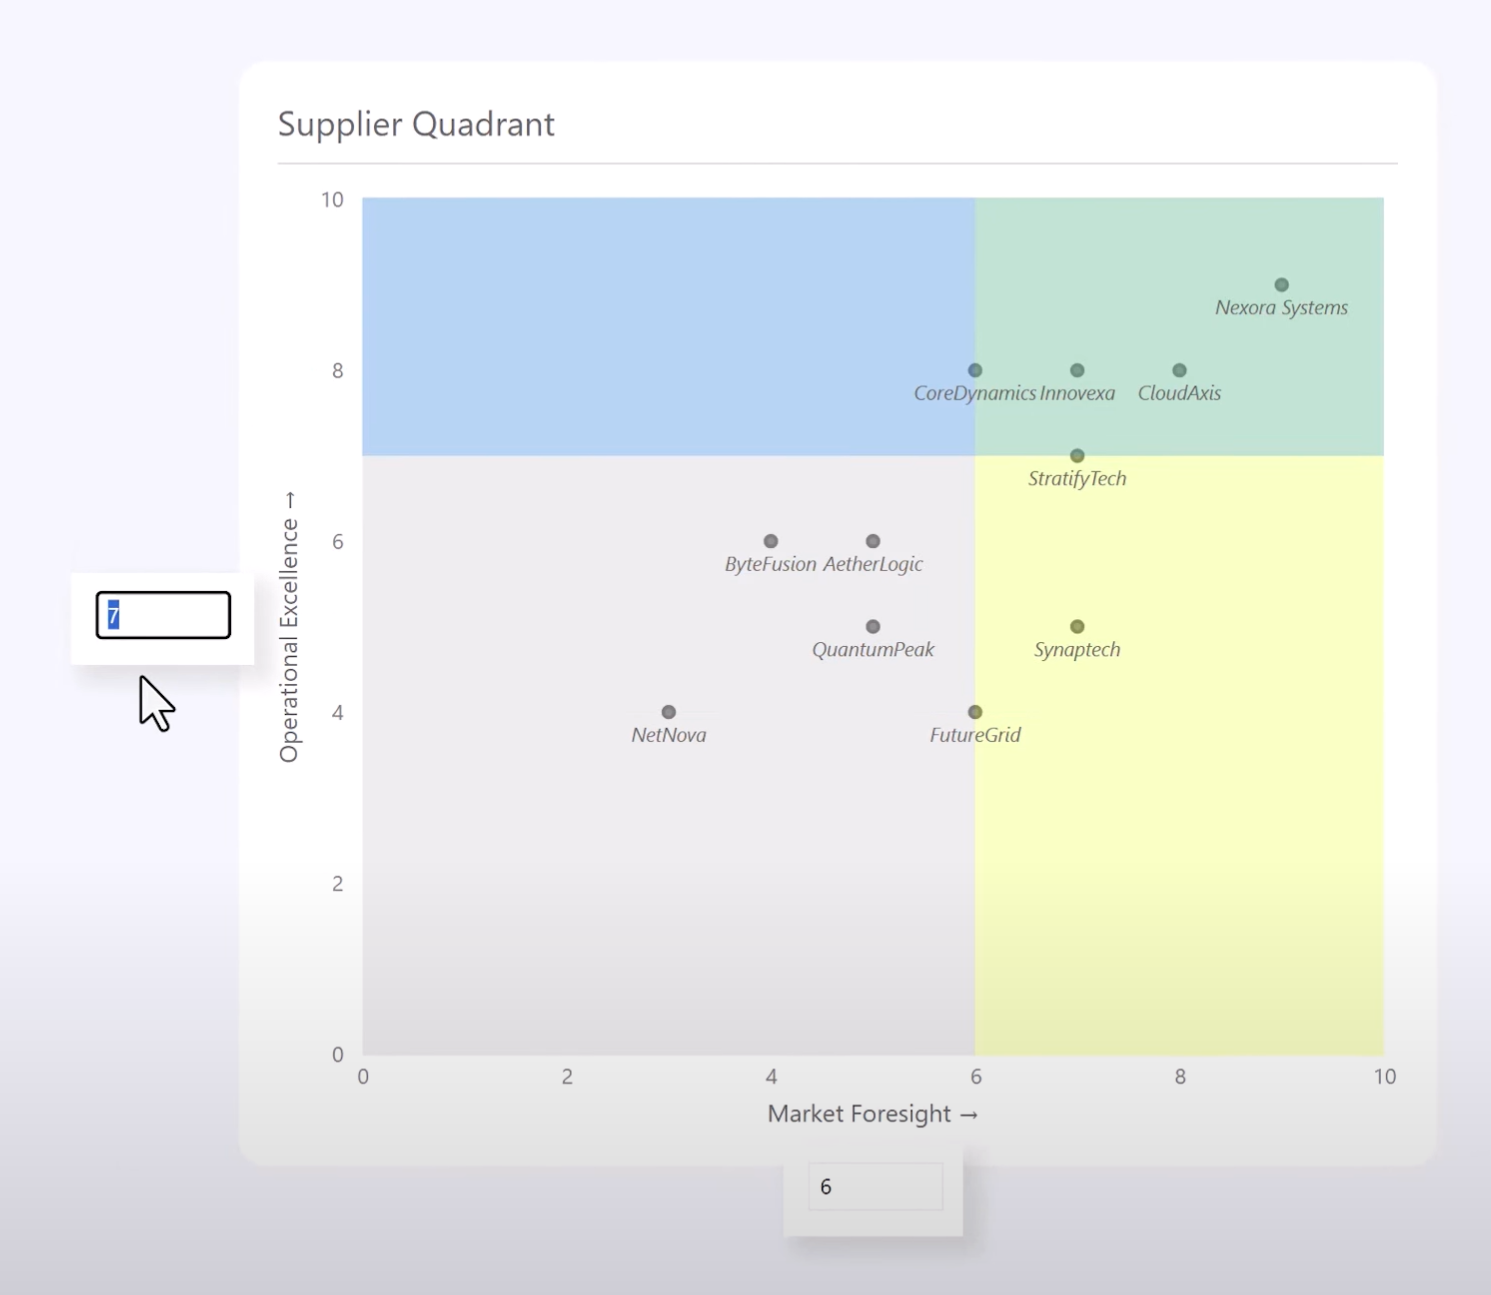
numeric parameters to allow users to interactively shift the quadrant boundaries.
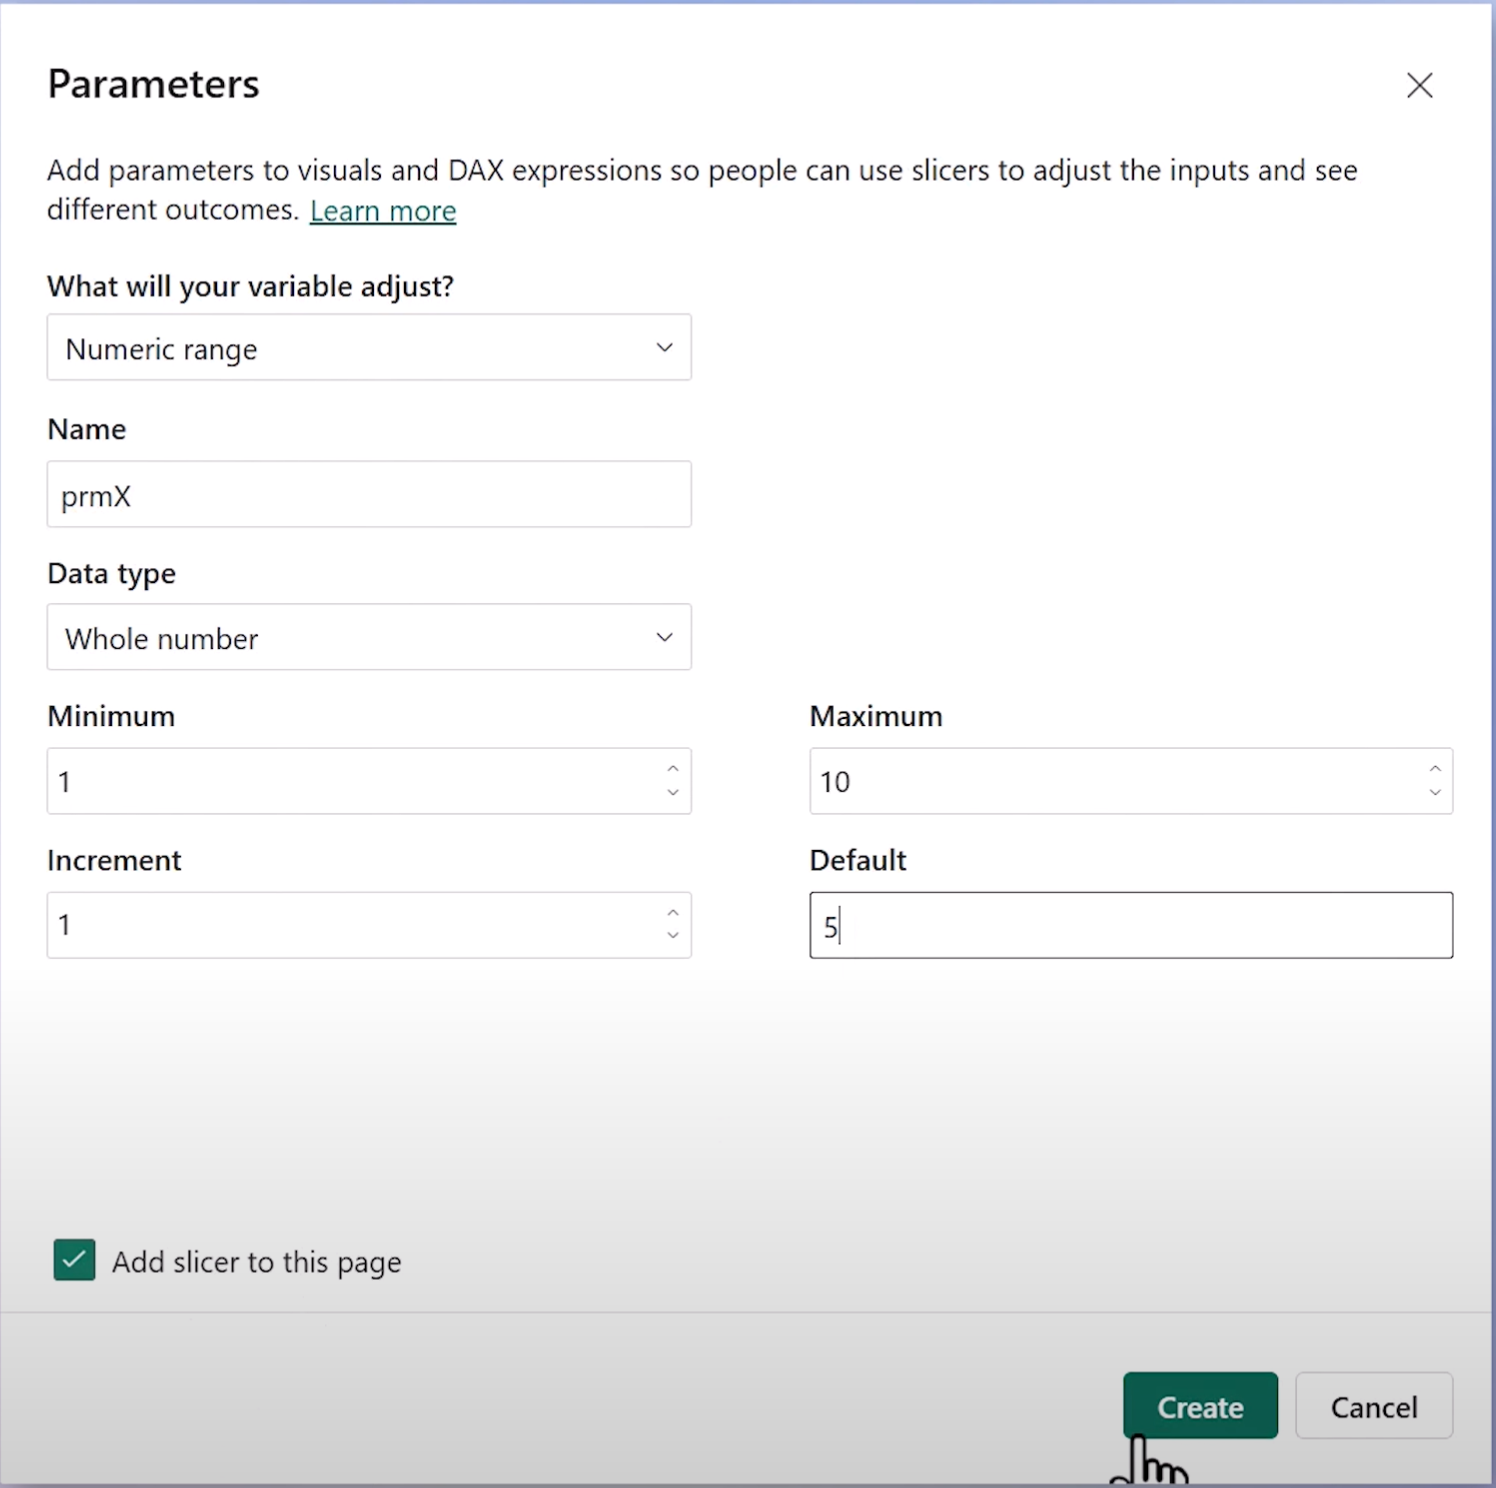
1. Go to Modeling > New Parameter > Numeric Range
- Name: Parameter X
- Range: 1–10
- Default: 5
2. Repeat for Parameter Y
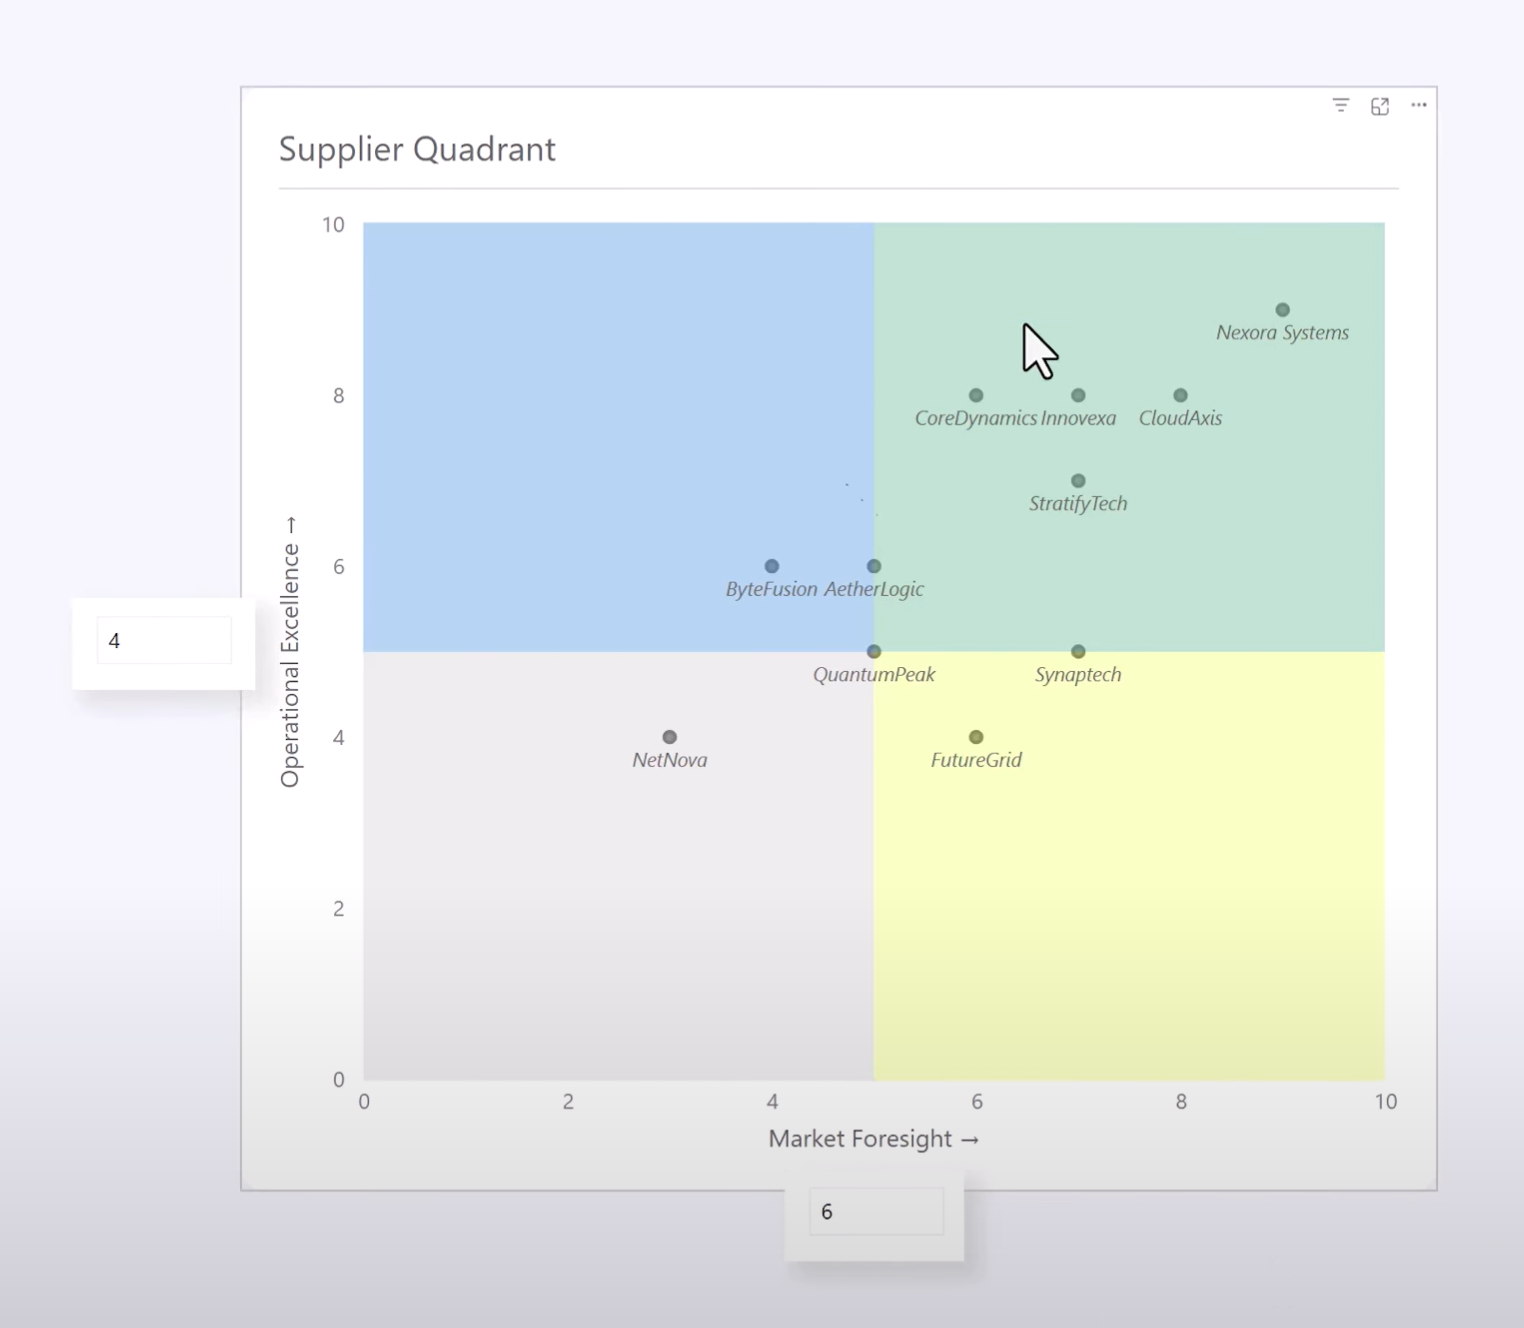
Add both slicers to the report, style them compactly, and place near the chart title.
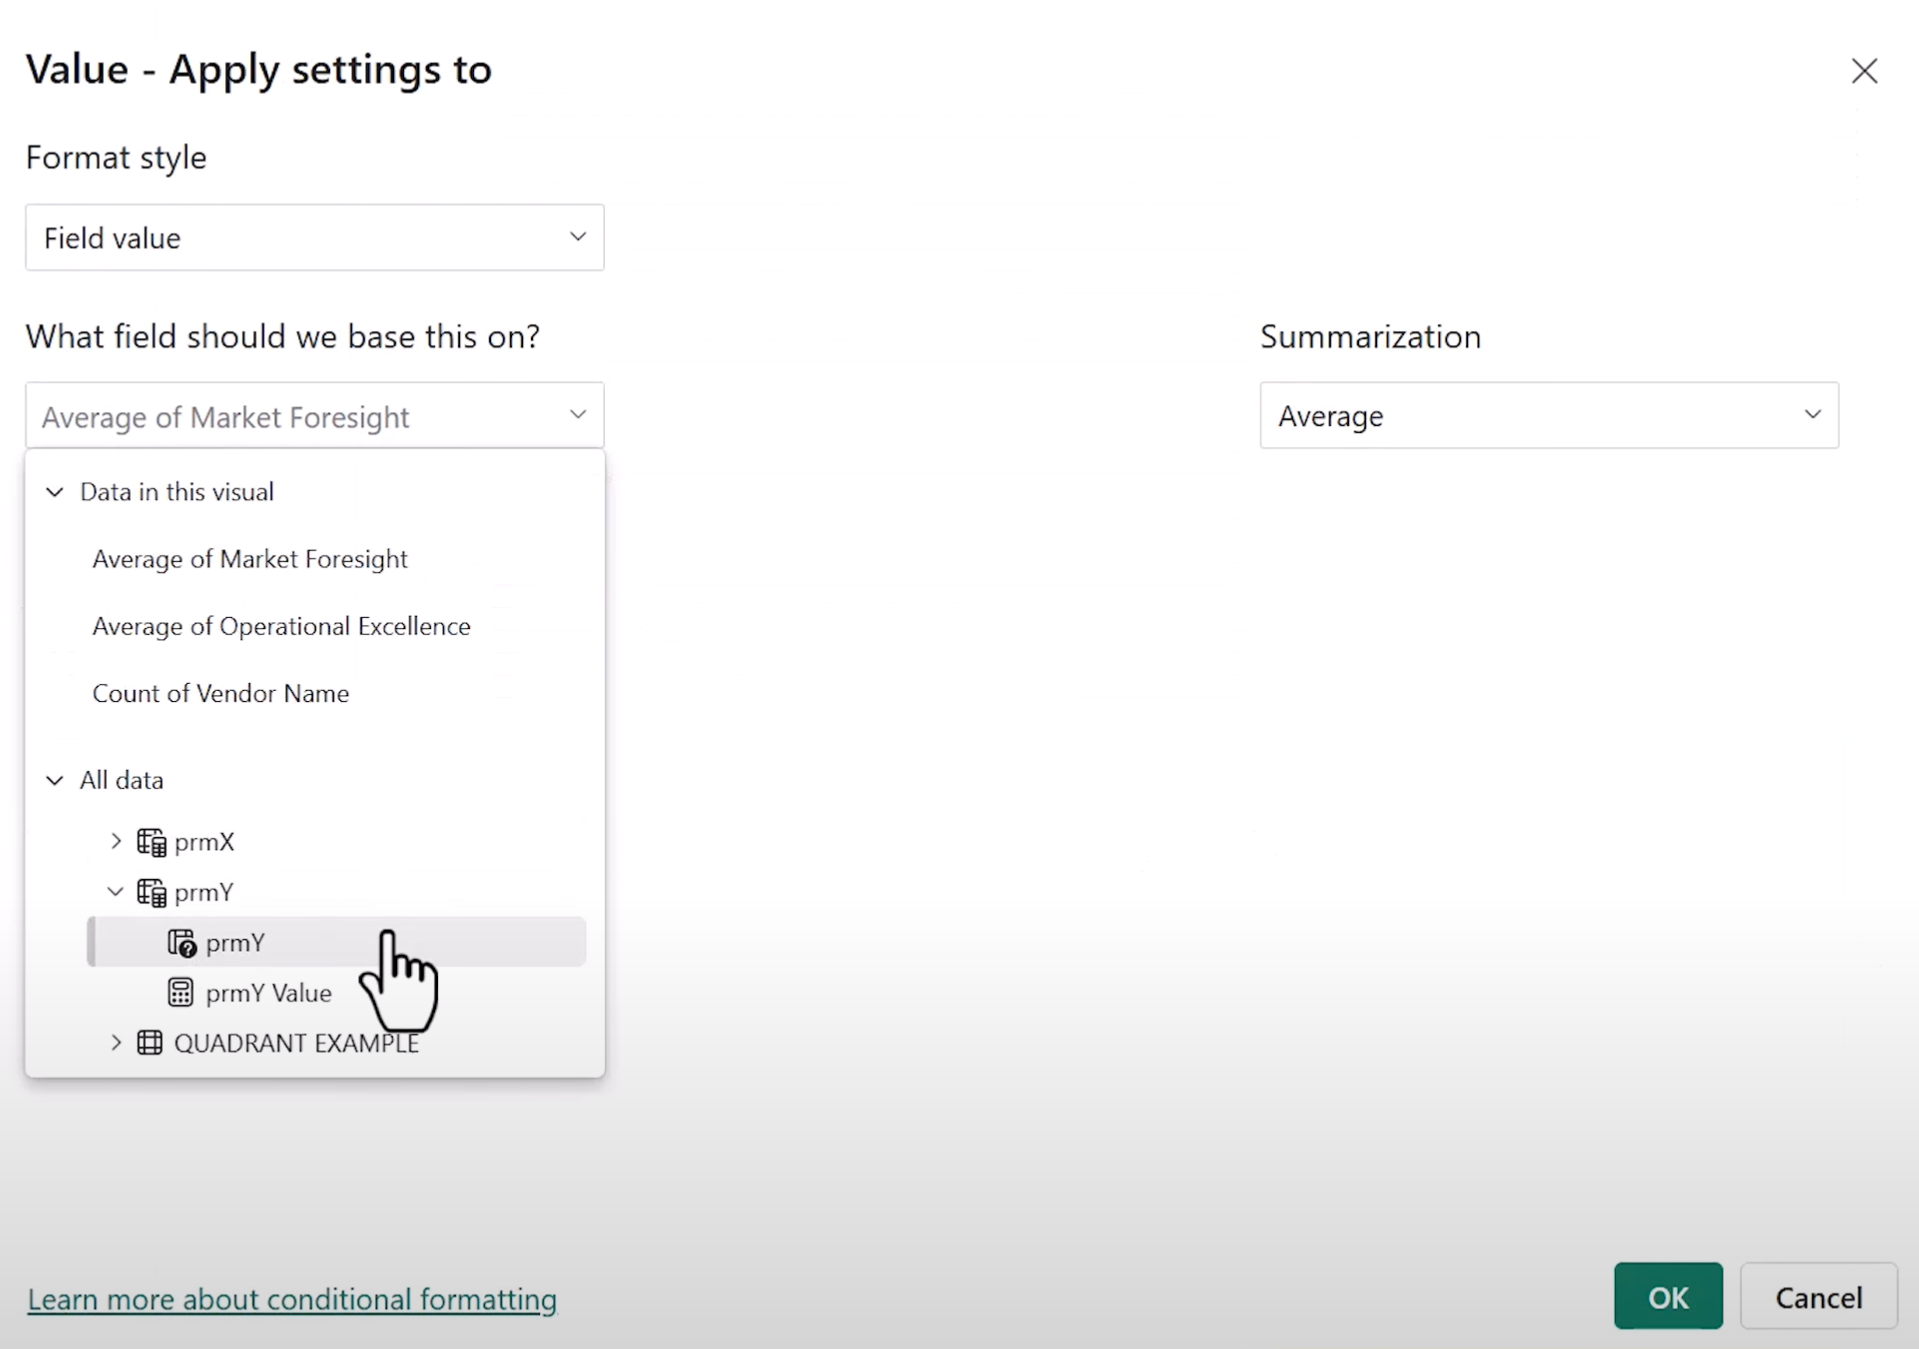
Link parameters to reference lines using fx binding:
- Set the constant value of each reference line to the corresponding parameter (Parameter X or Parameter Y)
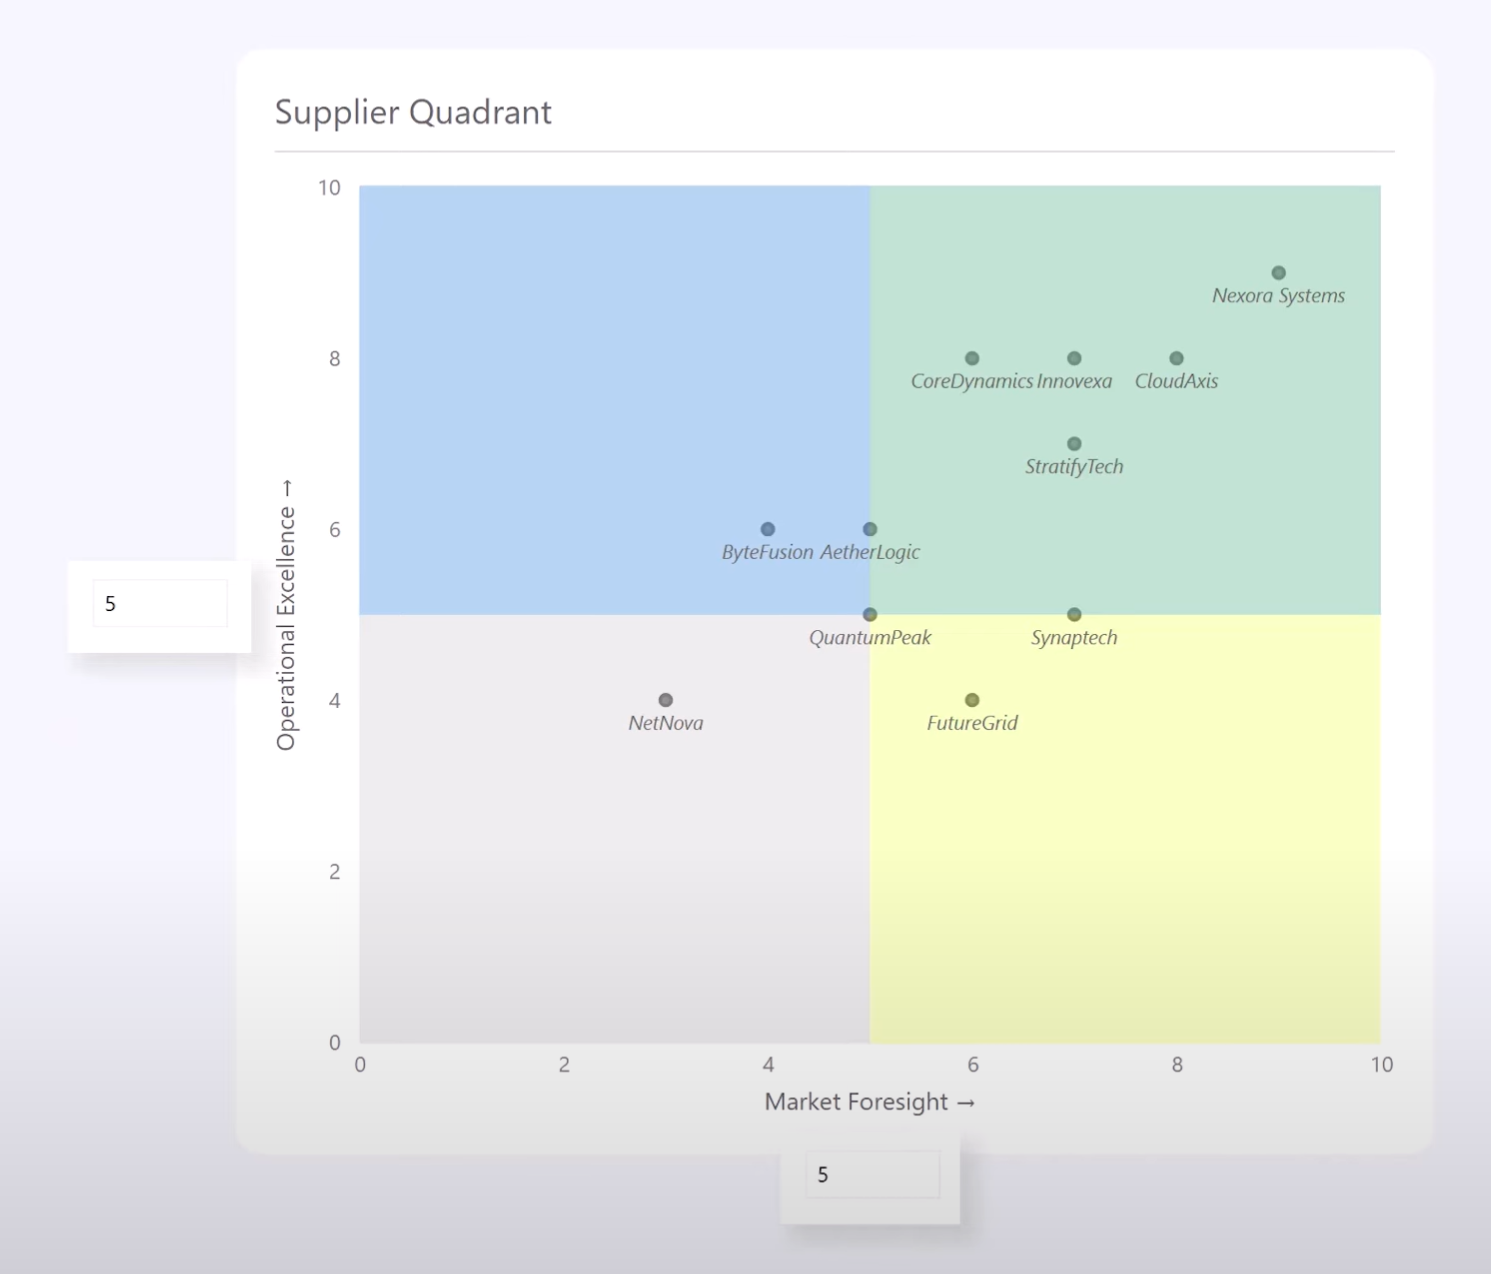
Step 6: Label Each QuadrantUse reference line labels:
- For top-right (e.g., Leaders)
- For bottom-left (e.g., Niche Players)
- Use dummy lines where needed to enable labels in places without lines
To fine-tune label placement and spacing:
- Use empty Unicode characters from tools like emptycharacter.com to simulate padding
Step 7: Use Symmetry Shading for Extra Context
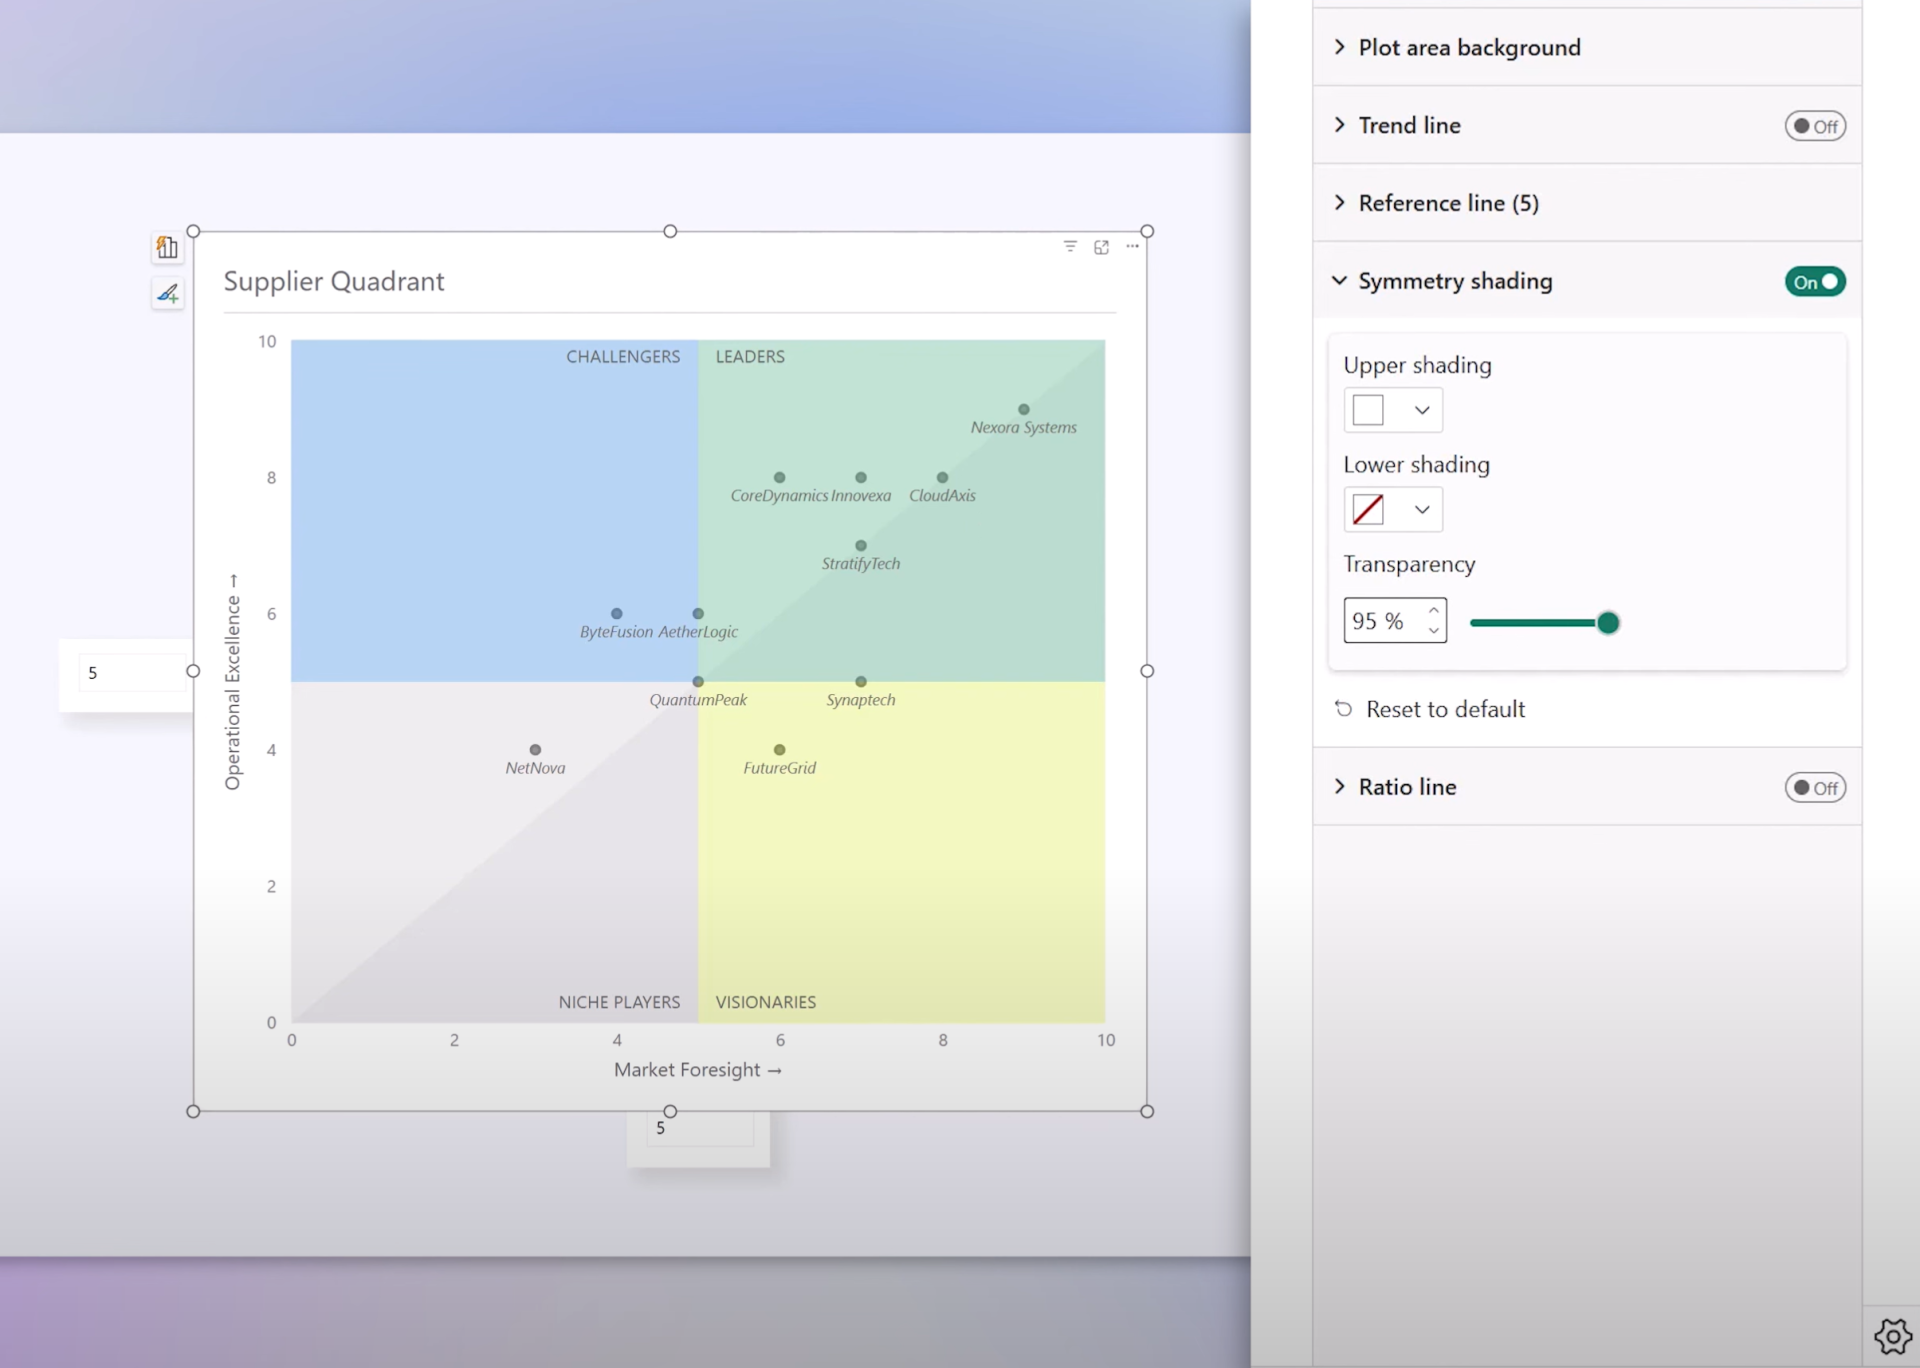
Enhance the chart with diagonal shading to show stronger orientation in one metric vs the other:
Add a diagonal shape or gradient
Use subtle colors (e.g., black/white with high transparency)
Final Touches
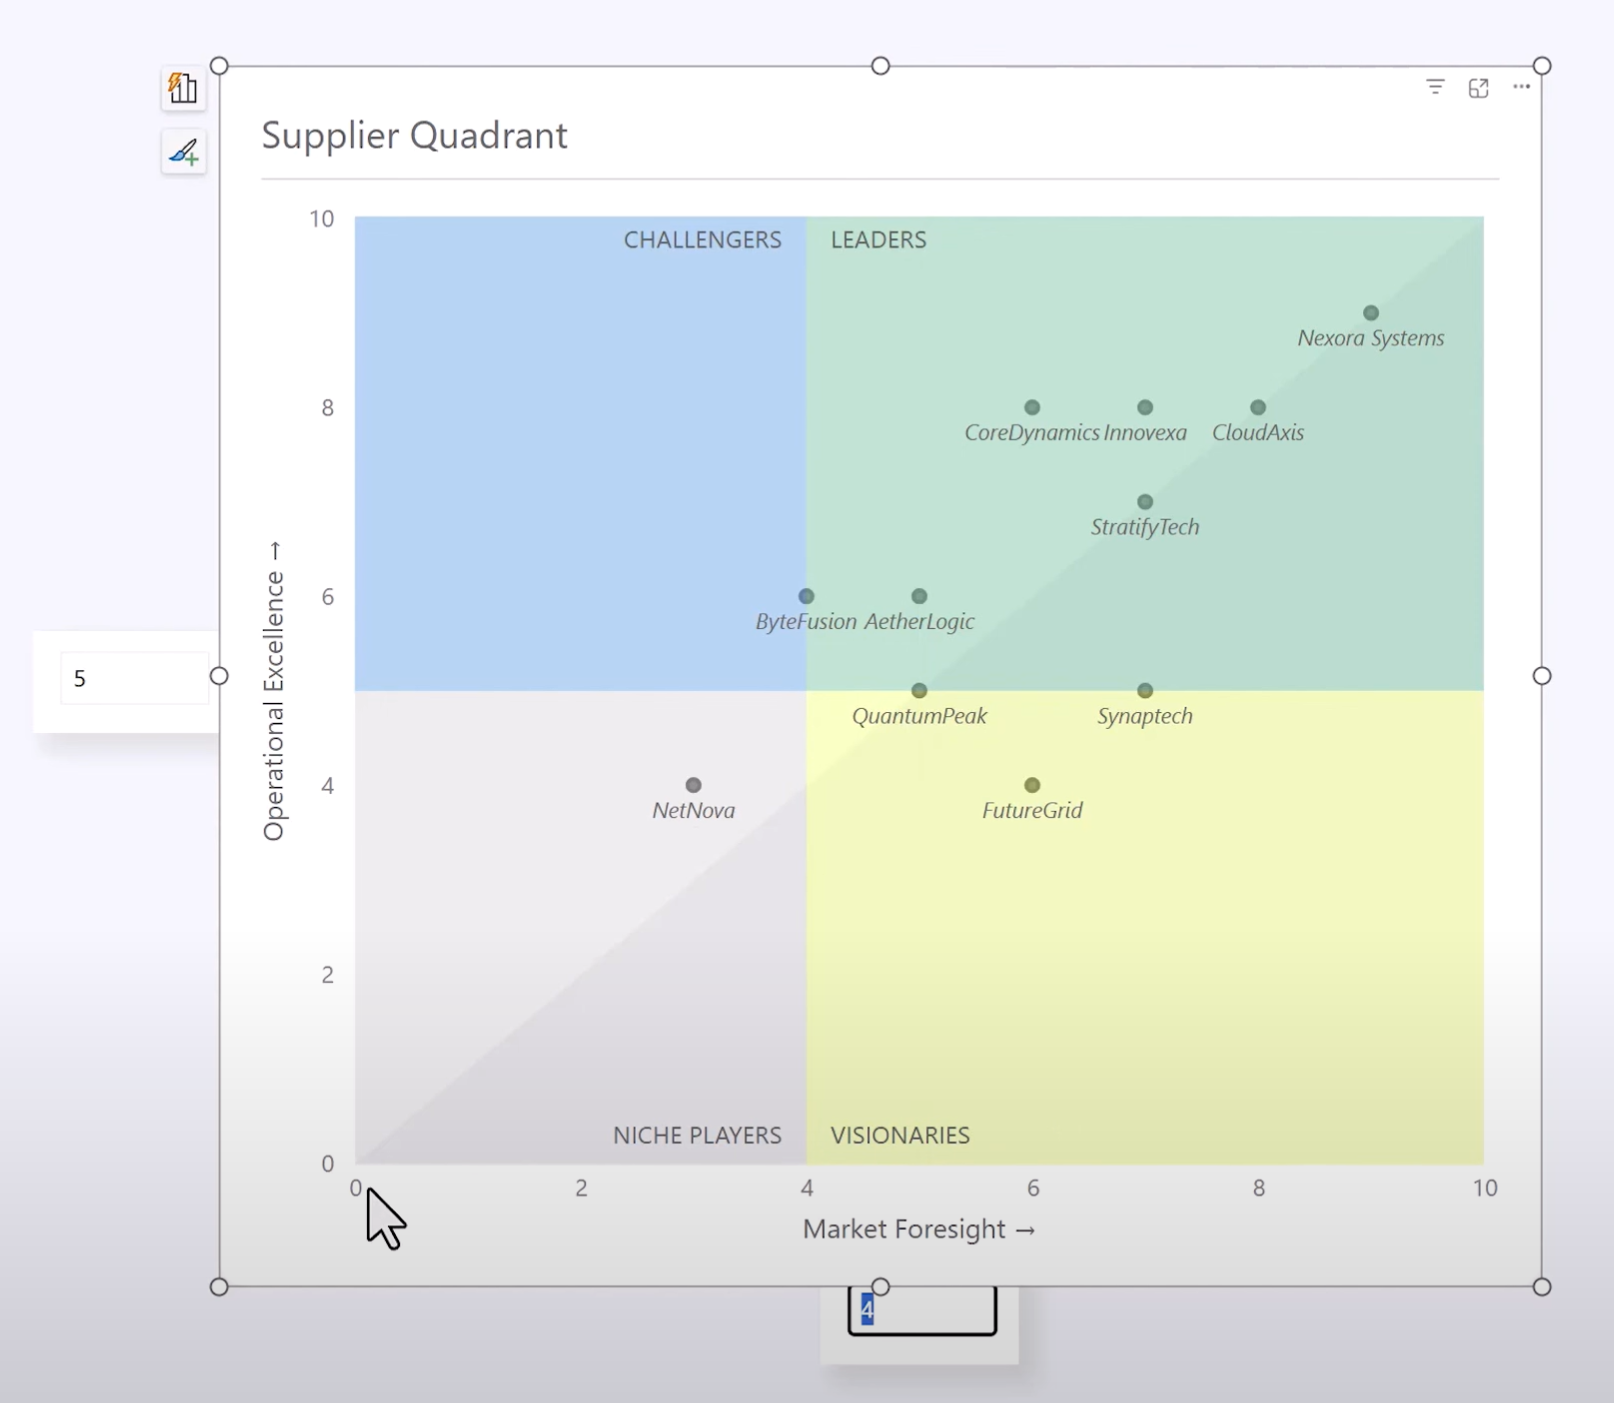
Your chart is now:
- Visually distinct
- Dynamic with adjustable quadrants
- Fully native - no external tools required
Summary
|
Feature
|
Description
|
|
Reference Lines
|
Create quadrant borders using X and Y axes
|
|
Shading
|
Color each area using new shaded region option
|
|
Parameters
|
Dynamically adjust quadrant boundaries
|
|
Labels
|
Add quadrant names using line labels or dummy lines
|
|
Symmetry Shading
|
Visually guide interpretation within quadrants
|
Hope you like it!
Give it a try and see how it works for you! I’d love to hear what you think or see how you use this trick in your own reports.